

While driving a vehicle Android Auto is the best companion providing you with all the stuff including entertainment on your vehicle display.
You can interact with your smartphone interfaces straight from the vehicle’s display. From accessing the maps to music, text messages, and calls, everything on your phone would be on board via the vehicle’s display.
But you might face disruptions if the settings of your phone or infotainment system on your car appear to be misconfigured. There could be several other reasons that might cause Android auto malfunctions.
Is your OnePlus Nord CE 2 Android auto not working? Here you go with this comprehensive guide, starting from quick to detailed, all the proven fixes are covered in this guide.
Try out these quick fixes in the first place,
Quick Fixes
Update the Android Auto App
- Open the “Play Store” and type “Android Auto” in the search bar.
- If there is any available update, then you will see the “Update” button.
- Tap the “Update” button to upgrade the Android Auto to the latest version.
Enable USB Debugging
- Head over to “Settings->About Phone-> Tap build number several times until the developer option is enabled.”
- Now, turn ON the toggle button for the “Developer option”.
- After that, go to “Settings->System->Developer options”.
- Finally, locate the “USB Debugging” option and enable it.
Allow All permissions to Android Auto
- Head over to “Settings->Apps & Notifications”.
- Next, tap “See all apps”.
- After that, locate and tap the “Android Auto” app.
- Finally, tap “Permissions” and allow all the permissions.
If you are still facing issues with the Android auto on your OnePlus Nord CE 2, then head over to the detailed fixes below to resolve this matter.
OnePlus Nord CE 2 Android Auto Not Working
Now, run the troubleshooting process with the help of these detailed proven fixes below:

- Verify the compatibility
- Restart your smartphone and Infotainment Device
- Check the cable
- Boot into Safe Mode
- Clear the Android Auto Cache
- Reset Apps Preferences
- Clear System Cache
- Update the phone software
- Configure the Android Auto Settings
- Perform Factory Reset
Verify the compatibility
First of all, you need to check whether your car supports the Android auto feature or not.

If your car is compatible with Android Auto and still you are unable to connect your OnePlus Nord CE 2, then head over to the next fix to eliminate the issue.
Restart your smartphone and Infotainment Device
Rebooting your device in the first place is one of the best, easiest, and quickest methods to eliminate small issues on your smartphone.
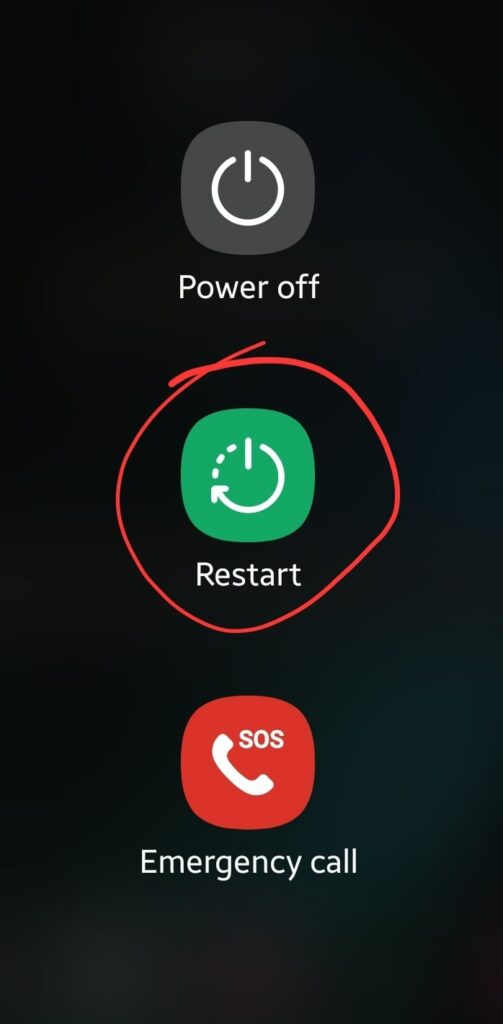
Restarting allows your device to take a fresh start. Therefore, restart your phone and meanwhile also restart the infotainment device of your car. Now, wait until both devices boot up.
After that, try to connect your OnePlus Nord CE 2 to a car using Android Auto.
Check the cable
If you are connecting your smartphone to a car with a USB cable, then you need to check the cable for any kind of damage. There is a chance your cable might be causing the issue hence resulting in an unstable connection.
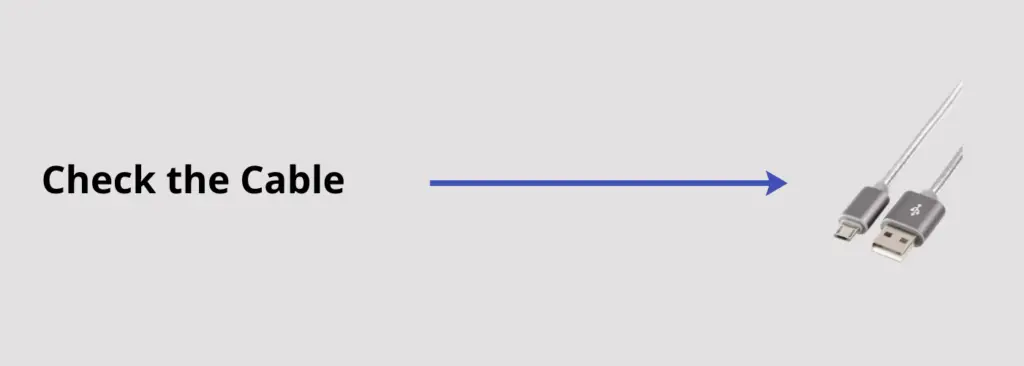
- The cable might be faulty
- It might be of poor quality
- It might be damaged due to bending and twisting
Try to use the official USB cable that comes with your OnePlus Nord CE 2 in the box.
Boot into Safe Mode
There might be a high chance of getting into an issue due to the interference of some of the third-party apps. To find out this, you need to boot your phone into safe mode.
Safe mode prevents the third-party apps from running and only just allows the built-in apps to be served in that particular mode.
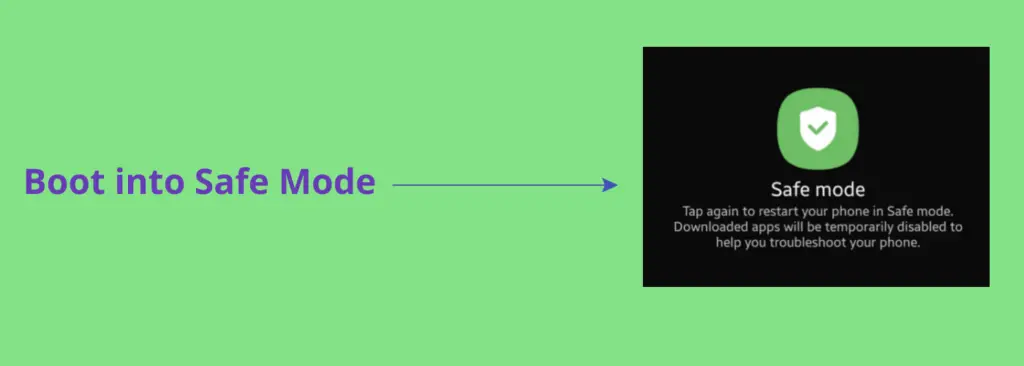
How To Boot OnePlus Nord CE 2 Into Safe Mode?
- Switch Off your smartphone.
- Next, press and hold the “Power” button until you see the OnePlus logo on the screen.
- Now, release the “Power” button, and press & hold the “Volume Down” button.
- After that, your phone will boot into “Safe mode” successfully.
- Finally, you can see the “Safe mode” label at the bottom left corner of the screen.
If Android Auto is working in safe mode, then there could be a problem with the third-party apps recently installed on your smartphone.
Uninstall all the third-party apps that are recently installed then reboot your phone. Once, your phone boots up successfully, then check whether Android Auto is working or not.
Clear the Android Auto Cache
A lot of times, many problems occur due to the cluttered data stored in the cache memory. This data appears to be the real culprit behind many issues. Hence, try to clear the cache of the particular app you are facing issues with.

Here’s how you can do that,
- Head over to “Settings”.
- Next, tap “Apps & Notifications” and then tap “See All Apps”.
- Further, locate the “Android Auto” app from the list and then tap on it.
- Now, tap “Storage & Cache”.
- Finally, tap “Clear Cache”.
Reset Apps Preferences
This method will remove the changes made in the app’s settings by you and will restore back to default settings. Sometimes, the changes made in the app’s settings might conflict and cause issues. Hence, you should try resetting the app’s preferences on your OnePlus Nord CE 2.

- Head over to “Settings”.
- Next, tap “Apps & Notifications” and then tap “See All Apps”.
- Further, tap the “three-dots” icon at the top-right corner.
- Now, select the “Reset app preferences” option.
- Finally, tap the “Reset Apps” button.
Clear System Cache
Another fix that can lead you to eliminate this particular issue is booting into the recovery mode of your smartphone. By doing so, you will be then able to wipe the cache partition. This method removes all the temporary files that might be causing issues to your device.

Steps To Follow below:
- Switch OFF your smartphone.
- To enter into recovery mode, press and hold the Power and Volume UP or Power and Volume Down buttons until you boot into recovery mode successfully.
- Once in recovery mode, use the volume buttons to switch between different options and the power button to select the desired option.
- In recovery mode options, select the “Wipe Cache Partition” option.
- When you are done with it, reboot your phone by selecting the “Reboot the System Now” option.
That’s it, you are done with clearing the system cache. Once your smartphone boots up successfully, then check whether Android Auto is working or still the problem persists.
Update the phone software
Minor bugs in the software of the phone might also cause issues. If your phone is running on outdated versions of the software, then there is a chance of being suffered from various issues. Hence, try to check for the recent available version of the software or any security patch update frequently.

- Head over to “Settings”.
- Next, tap “Systems”.
- Scroll down to the bottom and tap “System Updates”.
Configure the Android Auto Settings
You need to check the settings of the Android Auto app and configure them correctly. If you found multiple cars in the paired devices history that were connected previously, then you should clear the list of previously connected cars by removing them. Now make a connection with a car and check whether it is working or not.
Here’s how you can set up Android Auto on your smartphone,
")
- Launch the “Android Auto” app on your smartphone.
- Now, connect your smartphone to a car with the help of a USB cable.
- Next, tap the “Connect a car” button and follow the on-screen instructions on your smartphone.
- Meanwhile, you will also get a prompt on your vehicle display.
- Simply, confirm by pressing the “ON” option.
- Now, you will be able to access your smartphone interface right from the vehicle display.
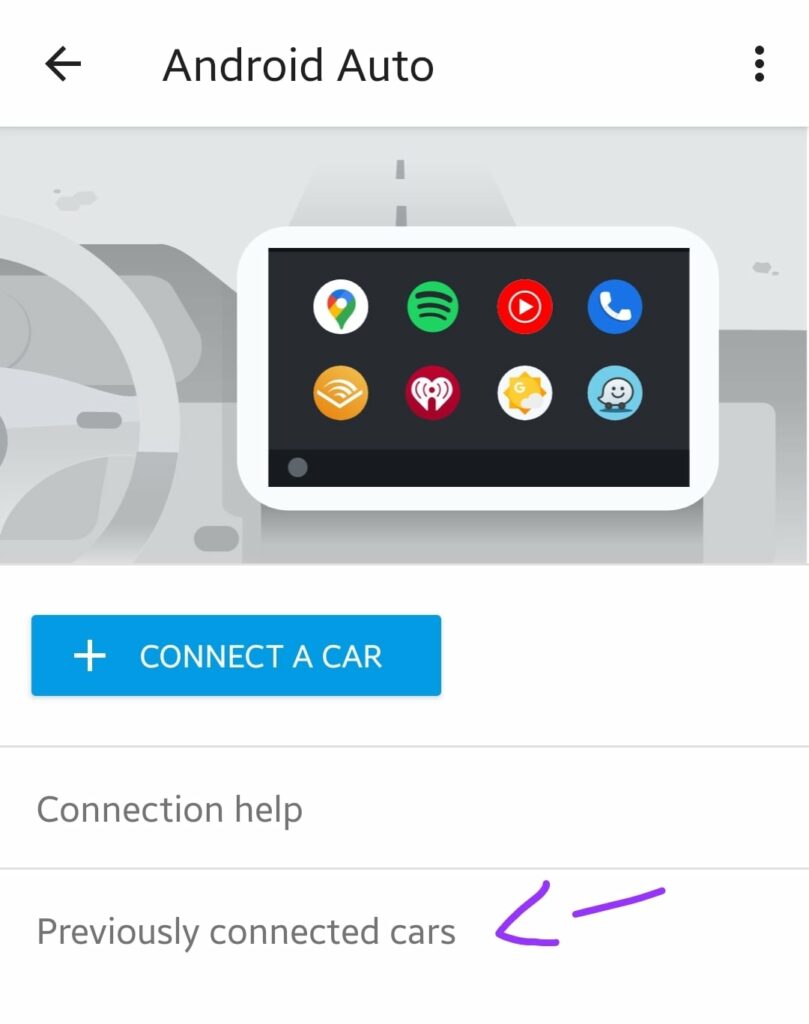
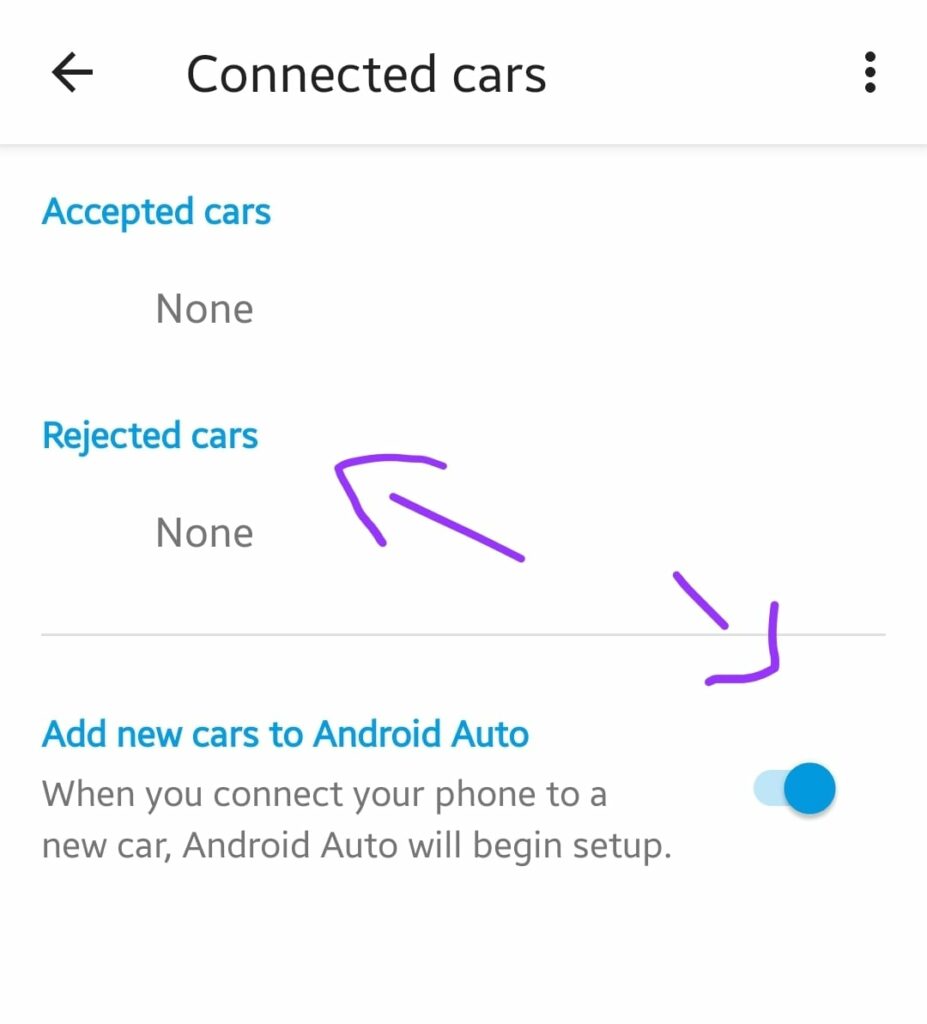
In case you are unable to connect your device to a car, then tap on the “Previously connected cars” option. Here you will be able to see two options, “Accepted cars” and “Rejected cars”.
If you find the car you want to connect in the “Rejected cars” list, then simply remove it from here and then try to connect it again. Also, enable the option “Add new cars to Android Auto”.
Factory Reset
When none of the other fixes work in your case, then factory resetting your smartphone is the only option you have.
The factory reset method is recommended to be adopted in the last due to its effectiveness. It restores all your phone settings to factory default and hence you will have to set up your phone from scratch again.

Here are the steps below:
- Head over to the “Settings”.
- Next, tap “Backup & Reset” and then “Factory Data Reset”.
- Finally, select “Reset Phone” and then “Erase everything”.
Wait for the process to complete, once it is finished, the phone will boot up and will be directed to the Welcome screen. Now, set up your phone accordingly by following the on-screen.
Related: How To Fix Google Pay Not Working on OnePlus Nord CE 2?
Conclusion
If you are facing issues while connecting your OnePlus Nord CE 2 to a car with Android Auto, then you should reboot your phone in the first place. Make sure the USB debugging option is enabled and also allow all the permissions to Android Auto on your phone. Moreover, to diagnose the issue in detail, boot into safe mode and then check.
Also, consider clearing the cache of the Android Auto app along with resetting the app’s preferences. Finally, perform a factory data reset operation to restore all the settings to the manufacturer’s default.