
First-Hand Experience: Why Galaxy A12 Mic Issues Are Common
After personally troubleshooting multiple Samsung Galaxy A12 devices, I’ve found microphone problems are rarely caused by complete hardware failure. In most cases, the issue comes from blocked mic ports, misconfigured settings, app permission conflicts, or software glitches—all of which can be fixed without replacing the phone.
The Galaxy A12 uses multiple microphones (main, secondary, and noise-canceling). If even one is blocked or disabled, users experience low volume, muffled audio, or no sound at all.
1. Reboot your phone.
- Simultaneously, press and hold the “Volume Up” and “Power” buttons until the power options appear on the screen.
- Next, select the “Power OFF” option and wait for your phone to completely turn OFF.
- Now, wait for several minutes (2-3) and then press the Power button to turn ON your smartphone.
2. Give Access To Microphone.
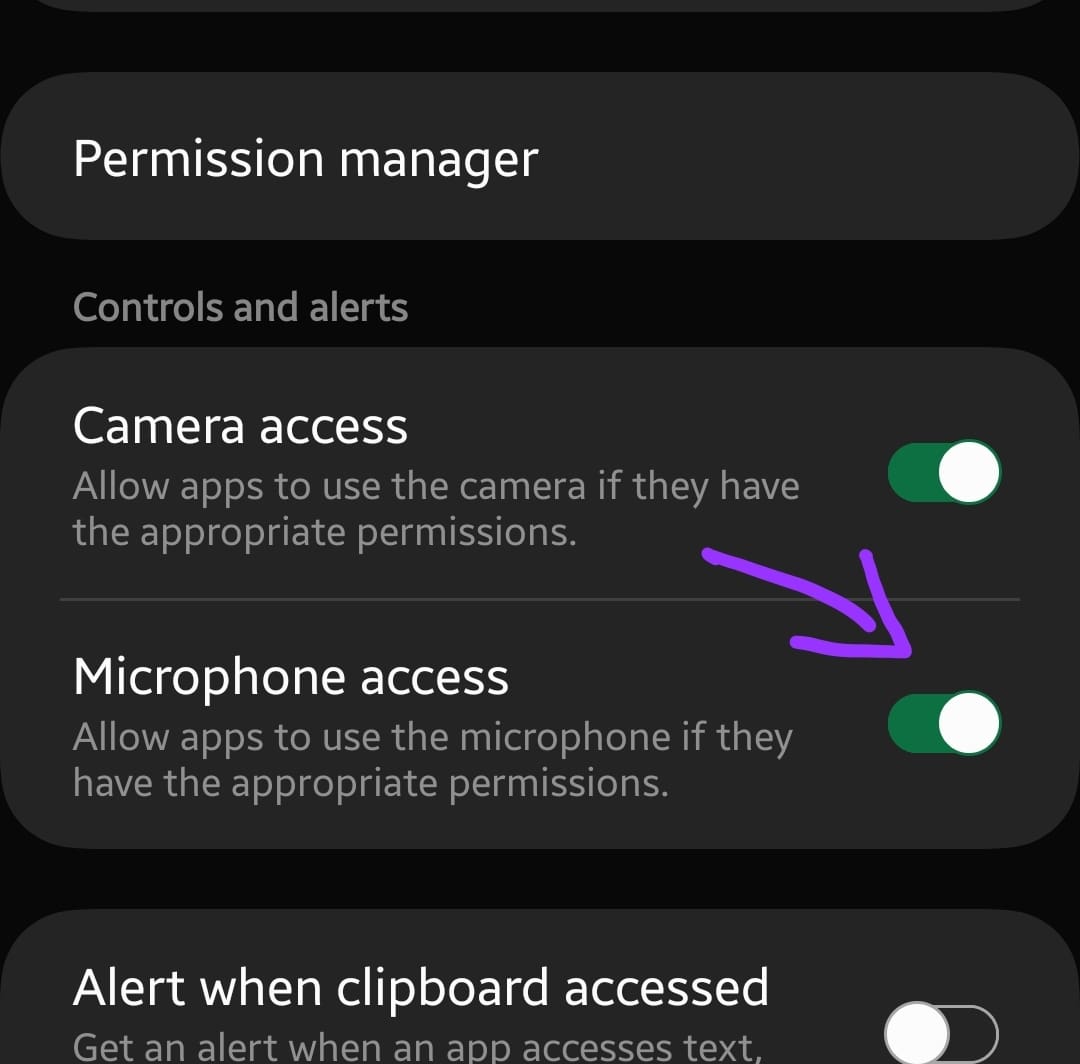
- Head over to the “Settings” on your phone
- Next, scroll down a bit and select “Security and Privacy”.
- Further, tap the “Privacy” option.
- Now, turn ON the “Microphone access” option.
3. Disable Bluetooth.
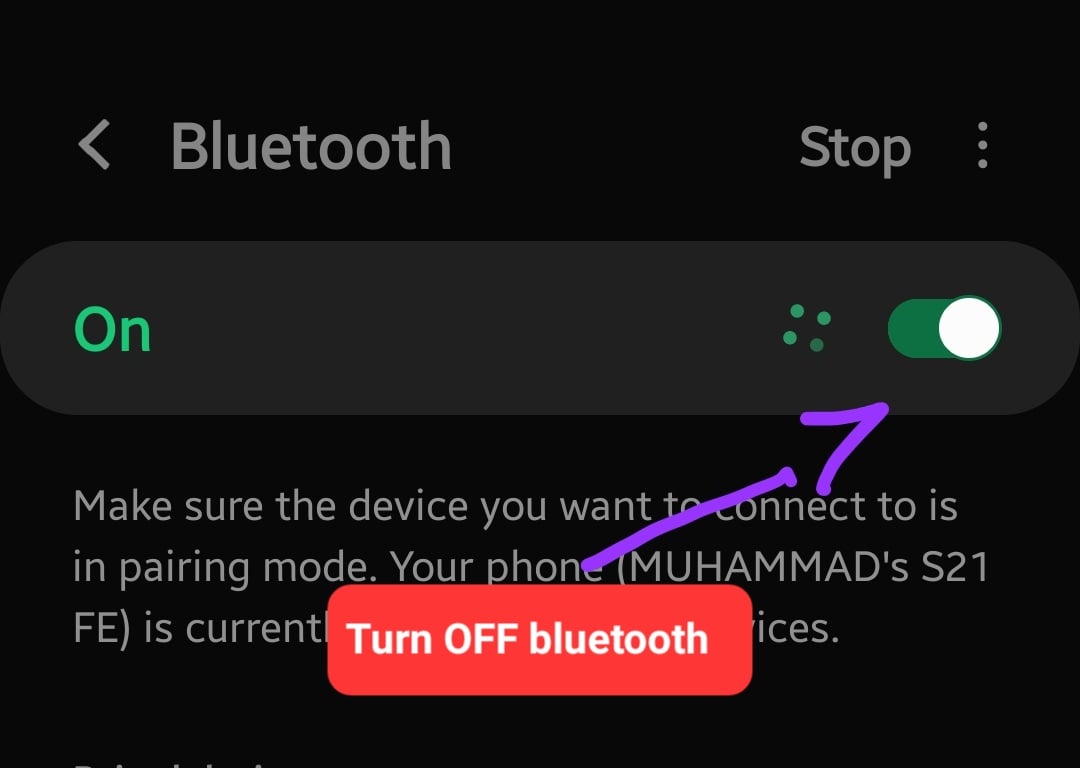
If any device is connected to your smartphone via Bluetooth, then the microphone of the other device such as headphones or earbuds will be used instead of your phone microphone. Therefore, turn OFF the Bluetooth on your smartphone and then check.
Samsung A12 Microphone Not Working
There is also a high chance that some third-party app might be causing issues. To verify this, you need to boot your phone into safe mode.
- Enter Safe Mode
- Give Microphone Permission for individual Apps
- Try to Clean the Microphone Hole
- Remove the phone case
- Update the phone software
- Disable Bixby Voice
- Reset All Settings
- Wipe System Cache
- Factory Data Reset
Enter Safe Mode
Safe mode is one of the best methods in the troubleshooting process. It diagnoses your phone for any kind of software-related issues. If you found no issue in safe mode, then it means some third-party apps are interfering and causing the issues.
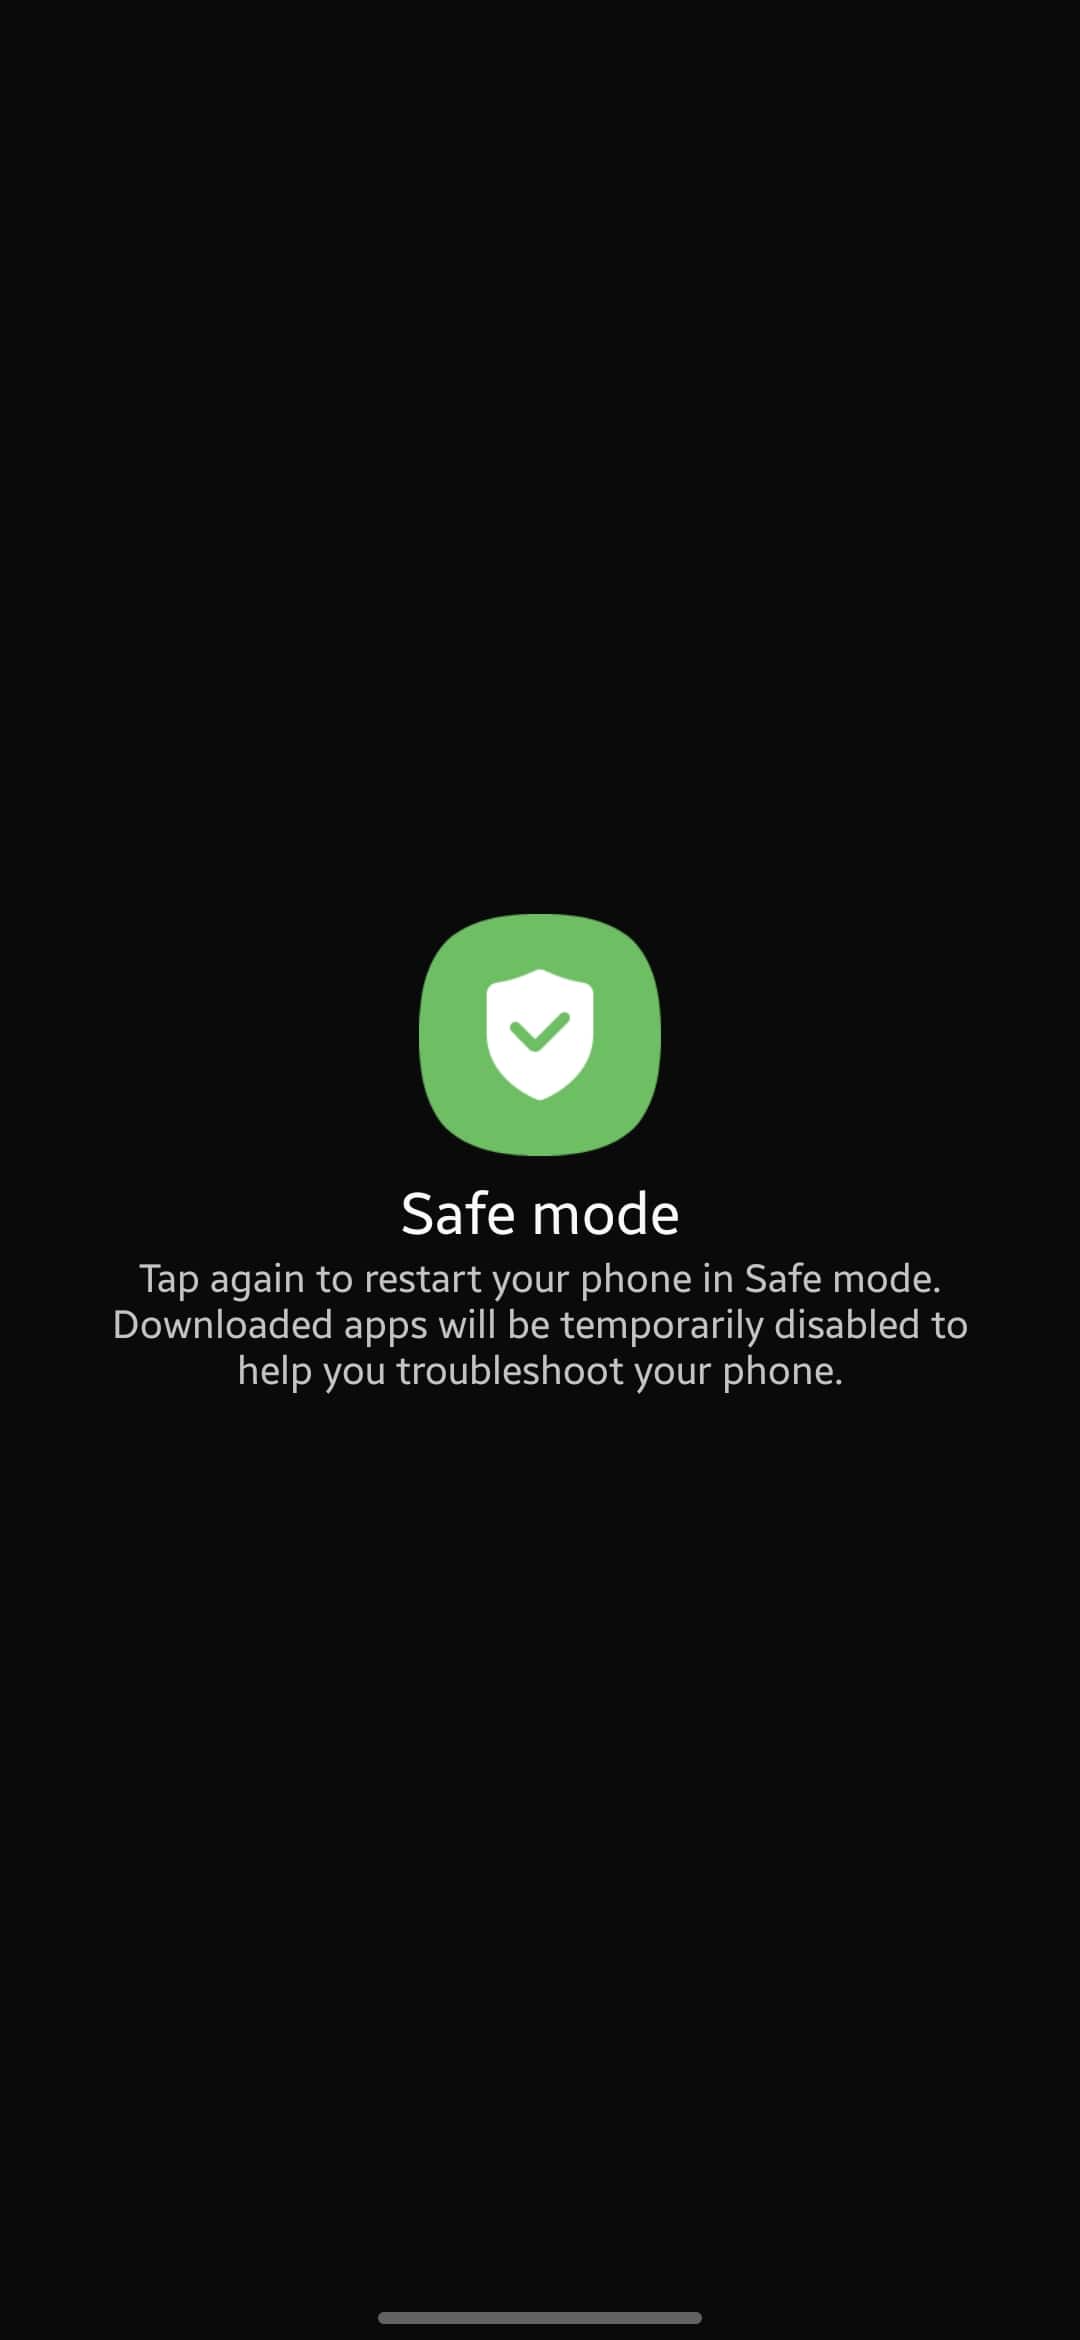
- Simultaneously, press and hold the “Power” and “Volume down” buttons until you see the power options appear on the screen.
- Next, Long press the Power icon for several seconds until you see the pop-up “Safe Mode”.
- Now tap the “Safe Mode” icon to confirm.
- After that, your phone will boot into “Safe mode”.
- Finally, you will be able to see the “Safe mode” label at the bottom left corner of the screen.
Try to delete all the recent third-party apps that are the real culprits.
Give Microphone Permission for individual Apps
In case, you are facing issues with the microphone on a particular app, then the issue might be with the app’s settings. You might not have been given access to the microphone. Therefore, go through the app’s settings and give permission to the microphone.
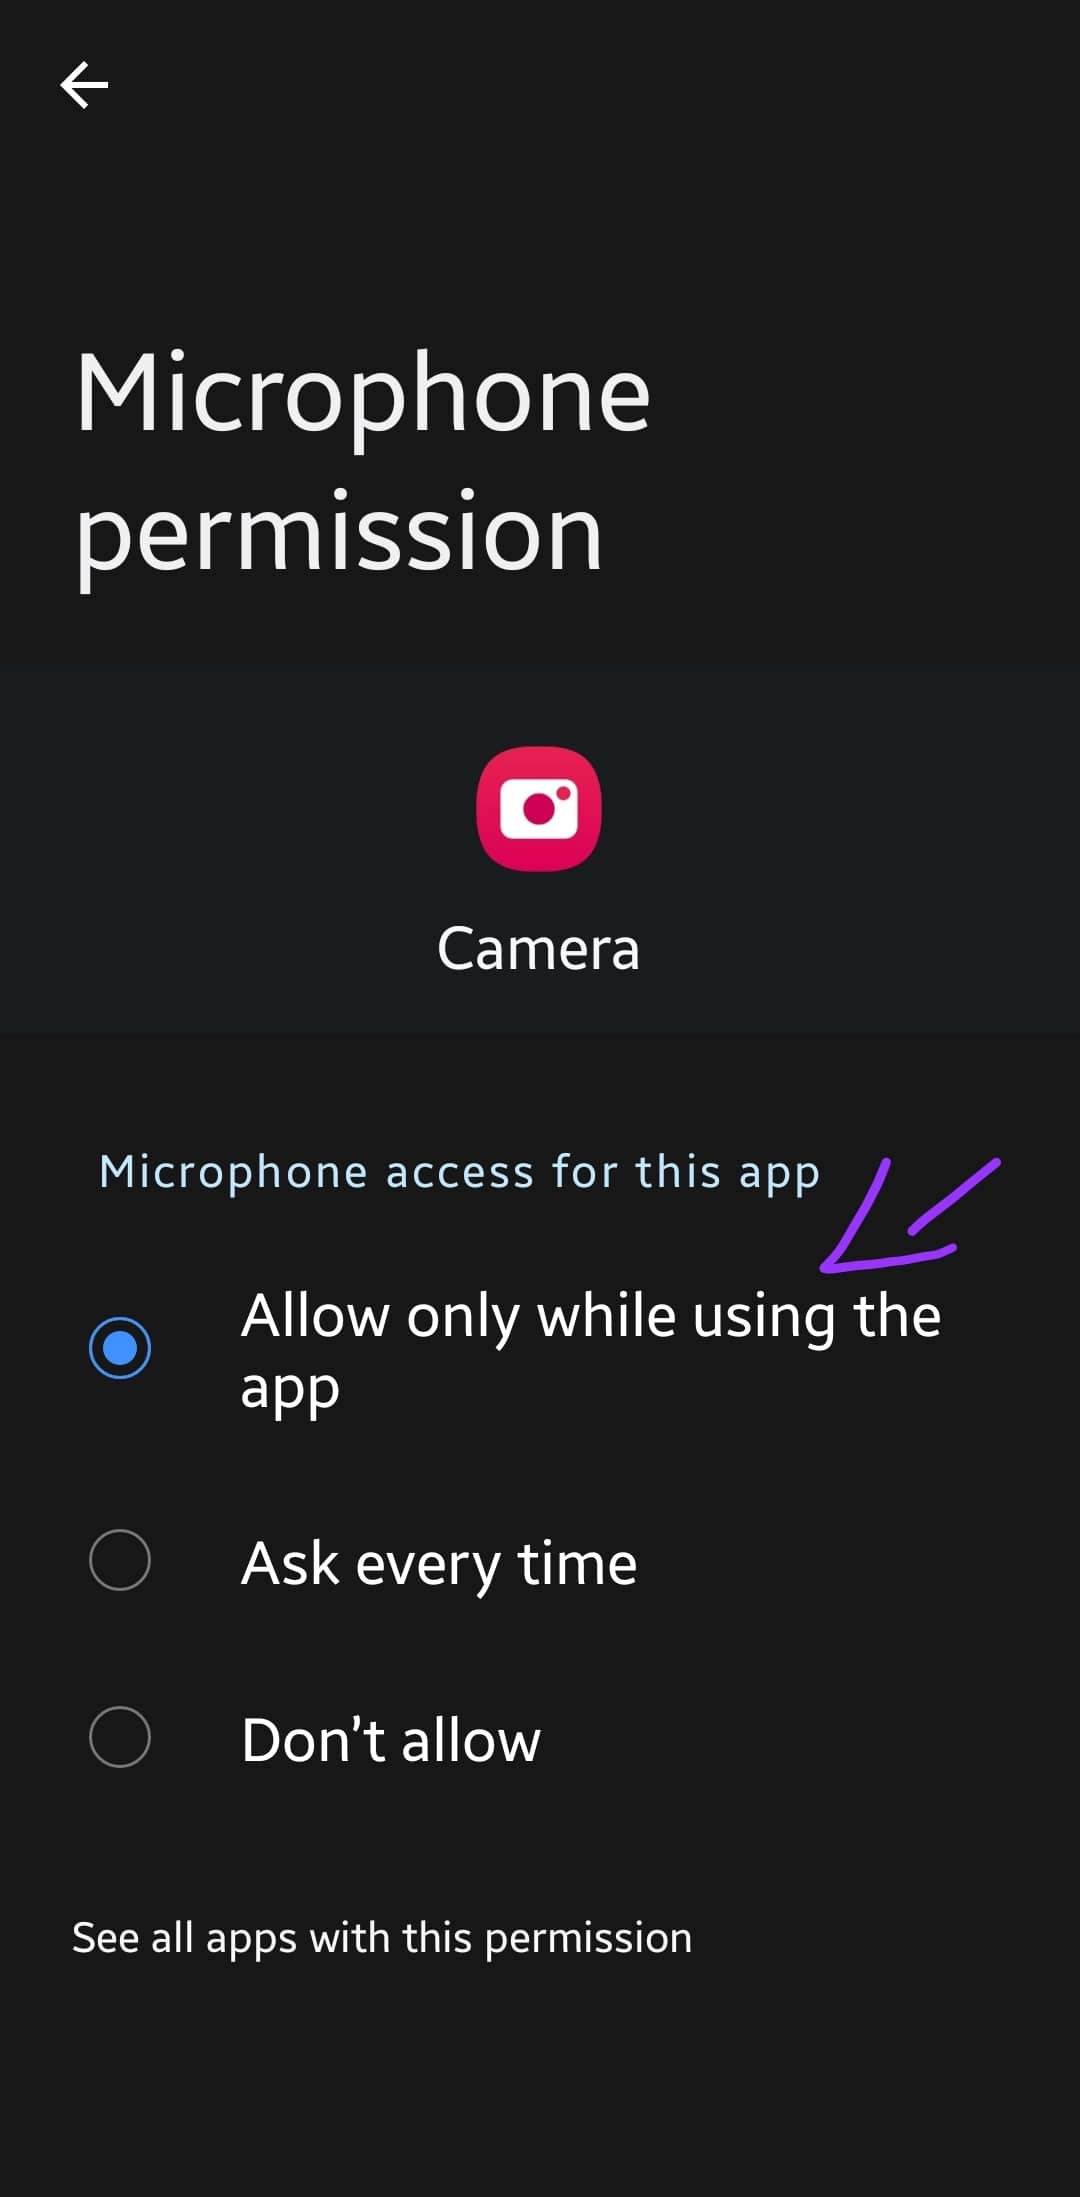
- Head over to “Settings” on your phone.
- Next, scroll down a bit and tap “Apps”.
- Further, select the particular app to enable microphone permission on it.
- Now, tap “Permissions” and then select “Microphone”.
- Finally, select the “Allow only while using the app” option.
Disable Bluetooth
If any device is connected to your smartphone via Bluetooth, then the microphone of the other device such as headphones or earbuds will be used instead of your phone microphone.
Therefore, turn OFF the Bluetooth on your smartphone and then check.
Try to Clean Microphone Hole
Tiny dust particles in the microphone of your smartphone might also cause severe interruptions. Therefore, it is recommended to check the microphone hole for any kind of dust particles. If the microphone on your smartphone is not working, then do consider cleaning it carefully with a tiny brush or something else.
Remove the Case
The phone might not be properly fitted in the case or the cutouts for the microphone might not be as precise as intended to be. Therefore, it’s better to remove the case and then check whether the microphone is working or not.
If the microphone starts working properly without the phone case, then the issue is with the phone case. The microphone hole might have been blocked in the phone case due to which the issue occurred. Buy some branded phone cases that have cutouts for all the components accurately.
Update the Phone Software
Most of the problems occur due to an outdated version of software running on the device. Hence, you need to check for the latest update and if available, then download and install it on your smartphone.

- Head over to “Settings” on your phone.
- Next, scroll down a bit and tap on “Software Update -> Download and install”.
- Wait as it will automatically check for recent updates.
If any recent version of the update is available, then download and install it on your Samsung A12.
Disable Bixby’s Voice
If the Bixby’s voice is activated on your phone, it runs in the background all the time regardless of any request. There is also a high chance, Bixby’s voice might be interfering with other apps using a microphone. Therefore, force stop Bixby’s voice.
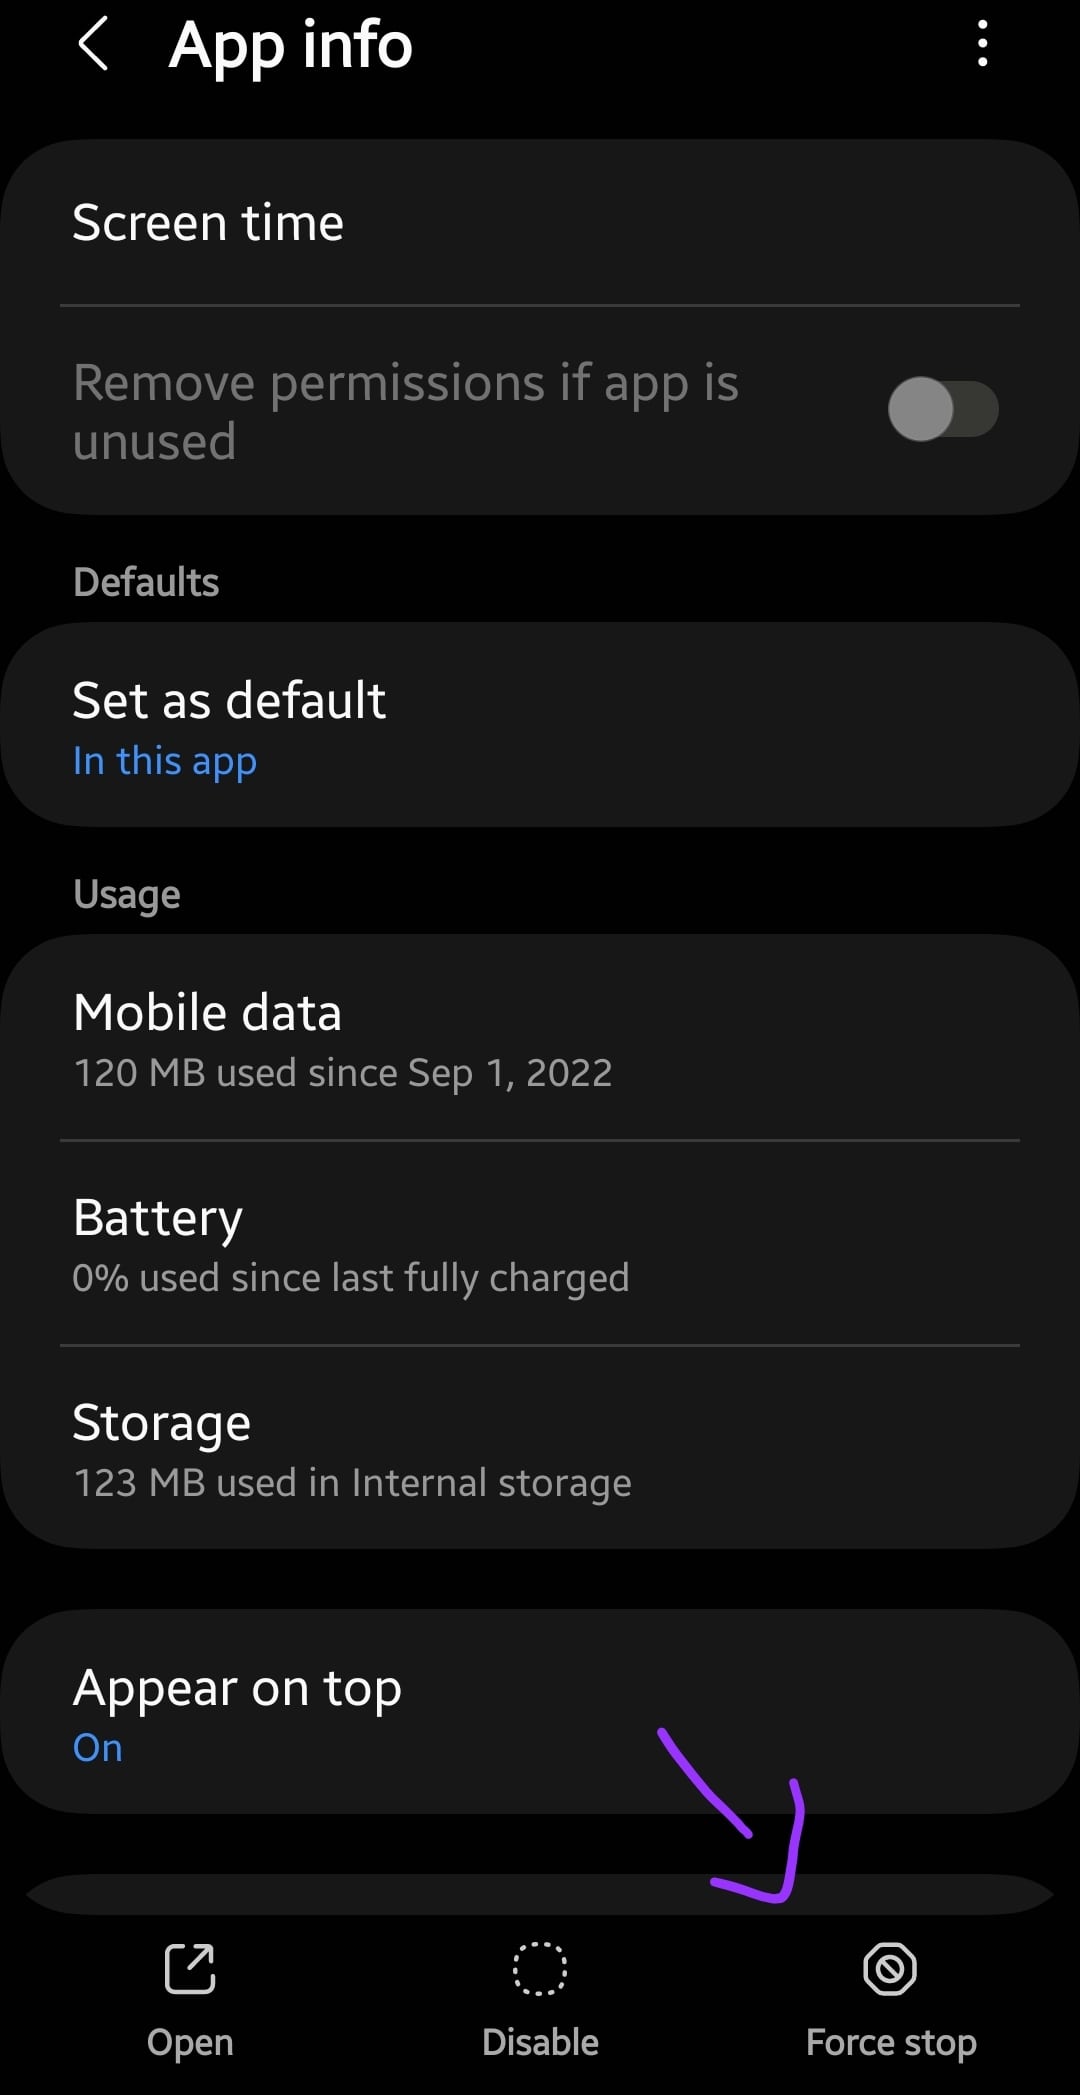
- Head over to “Settings” on your phone.
- Next, scroll down a bit and tap “Apps”.
- Further, select “Bixby’s voice” from the list of apps.
- Finally, tap the “Force Stop” button at the bottom.
Reset All Settings
Sometimes, the changes made to settings might conflict and cause severe interruptions. The microphone issue might also be the result of these changes. Therefore, you should try to reset all the settings on your phone. This won’t harm any of your personnel data, accounts, or settings for the downloaded apps on your phone.
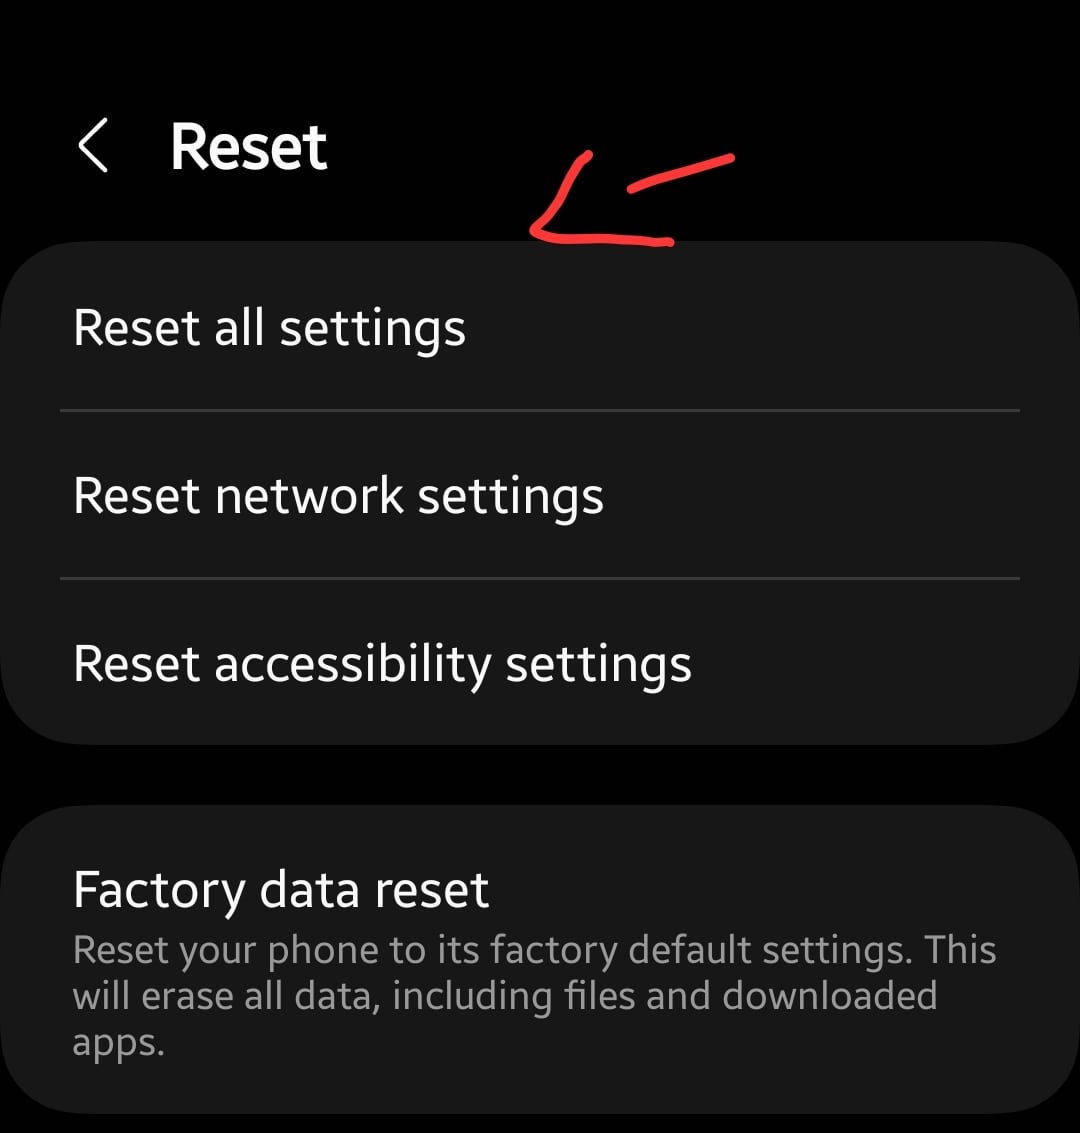
- Head over to the “Settings”.
- Next, tap “General Management”.
- Further, scroll down a bit and tap “Reset” and then “Reset All Settings”.
- Finally, tap the “Reset Settings” button.
Wipe System Cache
Another fix that can lead you to eliminate this particular issue is by booting into the recovery mode of your smartphone. By doing so, you will be then able to wipe the cache partition. This method removes all the temporary files that might be causing issues to your device.

Steps To Follow below:
- Switch OFF your smartphone.
- To enter into recovery mode, press and hold the “Power” and “Volume UP” buttons until you boot into recovery mode successfully.
- Once in recovery mode, use the volume buttons to switch between different options and the power button to select the desired option.
- In recovery mode options, select the “Wipe Cache Partition” option and continue by pressing the “Yes” to confirm.
- When you are done with it, now reboot your phone by selecting the “Reboot the System Now” option.
That’s it, you are done with clearing the system cache. Once your smartphone boots up successfully, then check whether the microphone is working or still the problem persists.
Perform Factory Reset
This method is very effective and worth considering when facing any kind of issue on your device. This will restore all the settings to the factory default settings. But you need to take a complete backup of your important data as it will wipe all the available data on your device.

Here are the steps below:
- Head over to “Settings” on your smartphone.
- Next, tap “General Management”.
- Scroll down to the bottom and you will see the “Reset” option. Just tap on it.
- Here, you will see various reset options.
- Tap on the one labeled “Factory Data Reset”.
- Now, it will provide you with information stating that all the data will be erased from your phone.
- Simply scroll down to the bottom and tap on the “Reset” button.
Now, wait for the process to complete, once it is finished, the phone will boot up and will be directed to the Welcome screen. Now, set up your phone accordingly by following the on-screen instructions.
Related: How To Fix Fingerprint Sensor Not Working on Samsung Galaxy A12?
Frequently asked Questions (FAQs)
Most Galaxy A12 microphone issues are caused by blocked mic ports, app permission issues, Bluetooth routing, or software glitches—not hardware failure.
Dial *#0*# in the Phone app and select “Mic” to run Samsung’s built-in hardware test.
This usually indicates the secondary microphone or call permissions are the issue, not the main mic.
Yes. Samsung software updates often fix audio and microphone bugs.
Expert Final Advice
If your Galaxy A12 microphone:
- Works in Safe Mode
- Passes Samsung’s mic test
- Improves after cleaning
Then the phone does not need replacement.
Most issues are configuration or blockage-related and fully fixable.
