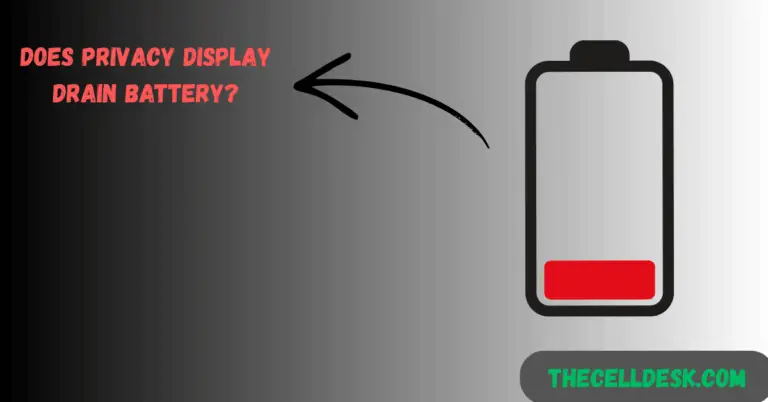
I have been through a problem with the latest version of the Google Messages app. The problem was not sending SMS without Mobile data or WiFi.
It was a very frustrating moment for me when I noticed that some of my important SMS was still pending due to some issues. The issue that was populated for not sending the SMS was “required internet”.
Initially, I wondered why this would happen with the SMS as by default, SMS only required a mobile network to send or receive SMS. So why would it happen? though the Google Messages app has additional advanced features like RCS chat, etc. that require the internet. But it shouldn’t need the internet for the SMS feature.
After spending too much time trying to find a real culprit behind this problem, finally found some issues with the Message app settings. It has been noticed that these changes in the settings are reflected after updating the Google Messages app to the latest.
How To Fix Google Messages Not Sending SMS?
Open the Settings on your phone.
Tap the “Apps” and then select “Messages” App.
Select the “Connection Method” option.
Finally, uncheck the mobile data options for SIM and select “OK”.
After making these required changes, finally restart your phone. Now, your Google Messages app will send SMS successfully using the mobile network only.
If you often use instant video messages to share moments with your contacts on Whatsapp and suddenly get stuck in an issue such as missing or not working, then here are some quick troubleshooting steps that I personally have used to restore this feature back to working.
Step 1: Make sure, your phone is connected to a stable internet connection.
Step 2: Update the WhatsApp from Playstore (Android) and AppStore (iPhone).
Step 3: Do check if this feature is enabled. You can go to WhatsApp and then access “Settings”. Now, tap the “Chats” and then toggle ON the “Instant Video Messages” option. Open chat in WhatsApp and then long-press the camera icon to activate this feature.
Step 4: Allow Background Data usage for the app. Simply, open the “Settings” and then “Apps” on your phone. Now select “WhatsApp” from the list. Now, select “Mobile data” and then toggle ON “Allow background data usage” and “Allow data usage white Data saver is on”.
Step 5: Clear the WhatsApp Cache. If you are still facing the issue, then this is a must to clear the cache as most of the time the issue occurs due to outdated or corrupted cache data. Go to “Settings->Apps” and then select WhatsApp from the list. Now, tap “Storage” and then tap the “Clear cache” option.
If you are unable to access any apps on your phone’s home screen and continuously face the error message “One UI keeps stopping”, then the One UI might be affected by some bugs.
You can easily solve this issue with the help of clearing the cache in the phone settings.
Open the “Settings” on your phone.
Tap “Apps” and then select “One UI Home” from the list of apps.
Tap “Storage” and then tap “Clear cache”.
If the issue persists, then you should reset the One UI by clearing its data. Follow the same steps above and then select the “Clear data” option.
Besides this, also consider clearing the cache and data of the “System UI”.
Open the “Settings” on your phone.
Tap “Apps” and then select “Show system apps”.
Now, search for “System UI” and tap on it.
Tap “Storage” and then tap “Clear cache” and “Clear Data” options.
Now, restart your phone and hopefully the issue will be resolved. Unluckily, if you are still stuck, then you need to check if there is an issue with some of the third-party installed on your phone.
Boot into Safe Mode
Safe mode provides a clear examination of whether or not your phone is affected by some third-party apps. If the UI works fine in the safe mode, then remove the recently installed third-party apps from your phone one by one until the issue is resolved.
Press and hold the “Power” and “Volume Down” buttons until the “Power Off” options appear on the phone screen.
Tap and hold the “Power Off” option until you see the “Safe mode” option appears.
Tap “Safe mode” and wait until the phone enters safe mode successfully. It should take several seconds.
Update the Phone Software
Keep your phone software up to date to eliminate software bugs and avoid any kind of unexpected interruptions. In some cases, software bugs can prevent your phone from functioning normally, as a result, you might also face freezing and rebooting issues.
Go to “Settings” on your phone.
Tap the “Software Update”.
Now, tap the ”Download and install” option.
If any recent version of the update is available, then download and install it on your phone.
Perform Wipe Cache Partition
Sometimes, you cannot just rely on clearing the app cache internally to resolve the issue. Chances are the issue might be arising due to the outdated and corrupted data involved in the system cache. In this case, performing a wipe cache partition can help you fix the issue.
Power OFF your smartphone.
Press and hold the “Power” and “Volume UP” buttons until you boot into recovery mode successfully.
Use the “volume” buttons to switch between different options and the “power” button to select the desired option in the recovery mode.
Select the “Wipe Cache Partition” option and continue by pressing the “Yes” to confirm.
At last, reboot your phone by selecting the “Reboot the System Now” option.
Reset All Settings
The improper phone settings can also put your phone into a situation like this. Performing a simple reset to restore all the settings to default on your phone can help you fix the issue.
Go to “Settings” on your phone.
Tap “General Management” and then “Reset”.
Tap “Reset all settings”
Finally, tap the “Reset settings” button.
Perform Factory Data Reset
If none of the above fixes works in your case, then try to perform a factory data reset on your phone. This will bring your phone to factory default settings with all the data being removed. Finally, you will need to set it up from scratch just like you did when you first unboxed it.
If you are suffering from Samsung Galaxy S24 Ultra freezing and rebooting issues while playing videos on Youtube, using Facebook, Twitter, and Instagram, this might be due to corrupted or outdated cache data.
First of all, you should clear the cache of the specific app one by one you are facing problems with. To clear the app cache,
Go to “Settings”.
Tap “Apps” and then select the particular app from the list, you want to clear the cache.
Tap the “Storage” option.
Now, tap the “Clear cache” option.
Check for the latest versions of the apps on the Play Store. If you find any recent version available, then download and install it on your phone. The latest version is the improved version of the app and might help you get rid of the phone freezing and rebooting issue.
Now restart your phone. If you are still facing the issue, then chances are your phone software might be affected by some bugs. Try to update the software of your phone.
Update the Phone Software
Consider updating your phone software to the latest version to eliminate the software bugs. Most often, these are the bugs that can cause these kinds of severe issues leading your phone to freeze and reboot abnormally.
Open “Settings” on your phone.
Tap the “Software Update”.
Finally, tap the ”Download and install” option.
If any recent version of the update is available, then download and install it on your phone.
Reset All Settings
Most of the issues including the phone freezing occur due to the wrong activity performed in the phone settings. You can restore all the settings to default without deleting any data by performing a reset all settings operation.
Open the “Settings” on your phone.
Tap “General Management” and then “Reset”.
Tap “Reset all settings”
Now, tap the “Reset settings” button.
Enter Safe Mode
If you find no issues on your phone while in safe mode, then there must be some third-party apps preventing your phone from functioning normally. Remove all the recently installed third-party apps from your phone one by one and check if the issue is gone.
Press and hold the “Power” and “Volume Down” buttons until the “Power Off” options appear on the phone screen.
Tap and hold the “Power Off” option until you see the “Safe mode” option appears.
Tap “Safe mode” and wait until the phone enters safe mode successfully. It should take several seconds.
Perform Wipe Cache Partition
Sometimes, clearing the app cache in the phone settings is not enough to resolve the issue. You must opt for clearing the system cache on your phone as a whole using the advanced technique.
This may require performing a wipe cache partition using the recovery mode on your phone.
Switch OFF your smartphone.
Press and hold the “Power” and “Volume UP” buttons until you boot into recovery mode successfully.
Use the “volume” buttons to switch between different options and the “power” button to select the desired option in the recovery mode.
Select the “Wipe Cache Partition” option and continue by pressing the “Yes” to confirm.
Now, reboot your phone by selecting the “Reboot the System Now” option.
Perform Factory Data Reset
There might be some malware or viruses present in your phone storage resulting in your phone malfunctioning. In this case, performing a factory reset will remove all the data present on your phone including the affected one, and restore all the settings to factory default.
If the AI Voice transcript feature stuck or freezes at a point and does not go further, then there might be permission issues. The microphone permission might not be allowed for this feature.
To tackle this issue, You need to allow all the permissions for this feature,
Open the “Settings” on your phone.
Tap “Apps” and then search for “Live transcribe & Sound Notifications”.
Tap “Permissions” and then tap “Microphone”.
Now, select the “Allow only while using the app” option.
If still the voice transcript is not working on your Samsung Galaxy S24 Ultra, then consider performing a soft reset on your smartphone.
Perform a soft reset
Press and hold the “Power” and “Volume Down” buttons together until the “Power Off” options appear on the phone screen.
Tap the “Power OFF” option and wait for your phone to completely turn OFF.
Wait for several minutes (2-3) and then press the Power button to turn ON your smartphone.
Clear the App Cache and Data
The issues often occur due to the incorrect or outdated data present in the app cache. You can overcome this issue by resetting the app cache and data.
Open the “Settings” on your phone.
Tap “Apps” and then search for “Live transcribe & Sound Notifications”.
Tap “Storage” and then tap “Clear Cache” & “Clear Data”.
Enter Safe Mode
Some third-party apps might be interfering with the transcribing feature. You can confirm it by entering the safe mode. If the voice transcript is working properly in the safe mode, then remove the recently installed third-party apps from your phone.
Press and hold the “Power” and “Volume Down” buttons until the “Power Off” options appear on the phone screen.
Tap and hold the “Power Off” option until you see the “Safe mode” option appears.
Tap “Safe mode” and wait until the phone enters safe mode successfully. It should take several seconds.
Reset all Settings
Open “Settings” on your phone.
Tap “General Management” and then “Reset”.
Tap “Reset all settings”
Finally, tap the “Reset settings” button.
Update the Phone Software
Updates often contain bug fixes and improvements for various functionality. Therefore, try to keep your phone software up to date for smooth performance and avoid compatibility issues.
Go to “Settings” on your phone.
Tap the “Software Update”.
Now, tap the ”Download and install” option.
If any recent version of the update is available, then download and install it on your phone.
Wipe Cache Partition
Sometimes, the issues require wiping the cache partition to get resolved. The system cache may contain the corrupted data causing issues on your phone. You can clear the system using the recovery mode of your phone.
Power OFF your smartphone.
Press and hold the “Power” and “Volume UP” buttons until you boot into recovery mode successfully.
Use the “volume” buttons to switch between different options and the “power” button to select the desired option in the recovery mode.
Choose the “Wipe Cache Partition” option and continue by pressing the “Yes” to confirm.
Now, reboot your phone by selecting the “Reboot the System Now” option.
Perform Factory Data Reset
You should restore your phone to the factory default setting at last. This will remove all the data from your phone. So if there are any corrupted data or incorrect settings involved will be removed.
Open “Settings->General Management”.
Scroll down to the bottom and tap the “Reset” option.
If you are facing an issue such as “Couldn’t fill the image, try again” while editing the photo in the editor with Generative edit, then you need to consider several things into account.
Make sure, the Generative AI feature is being enabled for the Photo Editor on your phone. It is not enabled by default on your phone for many tools including the Photo Editor. So, consider enabling it manually.
Open the “Settings” on your phone.
Tap “Advanced features” and then “Advanced Intelligence”.
Tap “Photo Editor” and then enable the “Generative edit”.
Moreover, if you are using the no-root firewall on your smartphone, it might block certain services and applications including the photo Editor and Samsung account. As a result, you might face issues with the Generative AI features.
Therefore deactivate the firewall or at least allow “Samsung account” and “Photo Editor” in the firewall settings.
Check the Internet Connection
Generative AI requires an active internet connection to work. So, If you are connected to an unstable internet connection, then it might not operate properly and often responds with errors.
Make sure, you are connected to a stable internet connection whether it be a WiFi network or a Mobile network.
Soft Reset your smartphone
Press and hold the “Power” and “Volume Down” buttons together until the “Power Off” options appear on the phone screen.
Tap the “Power OFF” option and wait for your phone to completely turn OFF.
Wait for several minutes (2-3) and then press the Power button to turn ON your smartphone.
Update the Photo Editor
Ensure the latest version of the Photo Editor is installed on your phone. You can confirm it by following the below steps,
Open the “Gallery” on your phone.
Open any “Photo” in the gallery and tap the “Edit” icon.
Tap the “three-dots” menu icon at the top and select the “About Photo Editor” option.
Now, you will be able to see if the latest version is installed already or if there is any update available.
Remove Battery Limitations
Settings the battery optimization to unrestricted for the photo editor app will allow it to actively run in the background without any limitations.
Open the “Gallery” on your phone.
Open any “Photo” in the gallery and tap the “Edit” icon.
Tap the “three-dots” menu icon at the top and select the “About Photo Editor” option.
Tap the “i” icon at the top right and then tap “Battery”.
Now, select the “Unrestricted” option.
Reset the Photo Editor
The incorrect data present in the app cache often causes issues. To overcome this, you should clear the app cache and data to completely reset the app.
Open the “Gallery” on your phone.
Open any “Photo” in the gallery and tap the “Edit” icon.
Tap the “three-dots” menu icon at the top and select the “About Photo Editor” option.
Tap the “i” icon at the top right and then tap “Storage”.
Now, tap the “Clear Cache” and “Clear Data” options.
Update your Phone Software
If there are any pending updates available for your phone, then download and install it. The update might contain improvements or bug fixes for the Generative AI feature.
Open “Settings” on your phone.
Tap the “Software Update”.
Finally, tap the ”Download and install” option.
If any recent version of the update is available, then download and install it on your phone.
Reset all Settings
If there is any wrong activity performed in your phone settings, it might be causing the issue. Just resetting all settings to default will eliminate the incorrect settings.
If you are unable to open the Gemini app on your iPhone, try to update the “Google” app. Once, you have updated the Google app on your iPhone, then press the “Gemini” icon next to the Google search and the Gemini AI will be activated.
If the Gemini app is not working on your iPhone such as crashing or responding, then try some of these proven fixes.
Check the Internet Connection
Make sure, your iPhone is connected to a stable internet connection, either a WiFi or mobile internet.
Gemini requires a stable internet connection to run actively on the phone to perform the required tasks.
Soft Reset your iPhone
Sometimes, it is just a matter of temporary software glitches causing the issues which can be easily solved by soft resetting your iPhone.
Press and hold the “Power” button on your iPhone until you see “Slide to power off” appears on the screen.
Swipe the slider to turn OFF your iPhone.
After 2 minutes, turn it back ON by pressing and holding the “Power” button.
Allow App Permissions
Allow all the required permissions for the Gemini on your iPhone. This may require camera, microphone, and location permissions.
Open the “Settings” on your iPhone.
Tap “Privacy & Security” and then tap “Location”.
Now, tap the “Google” app.
Make sure, the “Use precise location” is turned ON.
Choose the location access for the app, and select “While using the app”.
Update your Phone Software
Keep your iPhone software up to date to avoid any kind of issues and interruptions.
Open “Settings” on your phone.
Tap the “General”.
Tap “Software Update”
Finally, tap the ”Download and install” option.
Enable Background App Refresh
You should enable the background app refresh for the Google app. This will allow the Google app to run in the background actively.
Go to “Settings” on your phone.
Tap “General” and then tap “Background App Refresh”.
Now, enable the background app refresh for “Google”.
Uninstall and Reinstall Google App
Removing the Google app and reinstalling it from scratch may fix the issue. Once, you have removed the Google app, then reinstall it. Launch the Google app and tap the Gemini icon to activate it. Further, follow the on-screen instructions to setup the Gemini AI on your iPhone.
Press and hold the “Google” app icon until it wiggles.
Tap the “-“ at the top of the icon.
Further, select “Remove App” and then follow the on-screen instructions to delete the app.
Now, go to the “App Store” and download and install the “Google” app.
If you are facing issues with the Gemini app on your phone, there could be several reasons such as misconfiguration in the phone settings or the app might not be properly setup.
Additionally, you might receive an error message such as “The app is not available for any of your devices” or “This item isn’t available in your country”.
If you face such an issue while downloading it from the Play Store, then don’t worry. You can still download the Gemini app from other sources and run it on your Android or iOS.
Make sure, your phone is connected to a stable internet connection (WiFi or Mobile internet).
Ensure your phone is running on Android 12 or above.
Update the “Google” and “Google Assistant” apps to the latest version.
Open Google Assistant and set it up as the Gemini AI assistant on your phone.
Select “English US” as the language in your phone settings.
Force Stop the Gemini App
There might be some temporary software glitches hindering the Gemini App from working. To eliminate these glitches, just force-stop the app and relaunch it.
Open the “Settings” on your phone.
Tap “Apps” and then select “Google Gemini”.
Tap “Force stop”.
Now, relaunch the Google Gemini on your phone.
Update the Google Gemini App
Go and checkout on the Play store, if there are any pending updates available for the app. If you find any update, then download and install it on your phone.
Long press the “Gemini” icon and select “App info”.
Scroll down to the bottom and tap “App details in store”.
Tap the “Update” button to update the app to the latest version. (Don’t get confused “Google Assistant is the integrated version of Gemini AI Assistant”).
Update your Phone Software
Besides checking the updates for the app, consider updating your phone software as well. Updates contain bug fixes and improvements for certain functionality of the phone keeping it away from issues.
Open “Settings” on your phone.
Tap the “Software Update”.
Finally, tap the ”Download and Install” option.
If any recent version of the update is available, then download and install it on your phone.
Clear the Google Gemini Cache and Data
The app cache might often contain outdated data, therefore resulting in numerous issues. To figure out if it is the app cache causing the issue, you must clear the cache and data of the app.
Go to “Settings” on your phone.
Tap “Apps” and then “See all apps”.
Now “Google Gemini” from the list of apps.
Select “Storage”.
Finally, tap the “Clear cache” and “Clear data” options.
Enable Background Data Usage
You may encounter issues with the Gemini app on your phone if the background Data usage is disabled. Because the Gemini app requires background data to actively run in the background.
Go to “Settings” on your phone.
Tap “Apps” and then “See all apps”.
Now “Google Gemini” from the list of apps.
Select “Mobile Data”.
Finally, enable “Allow Background data usage”.
Remove Battery Restrictions
You should allow the Gemini app to run without any background restrictions on your phone. This way the app may work properly without any issues.
Go to “Settings” on your phone.
Tap “Apps” and then “See all apps”.
Now “Google Gemini” from the list of apps.
Select “Battery”.
Finally, select “Unrestricted”.
Wipe Cache Partition
Sometimes, the issue is not just limited to the app cache, it may also occur due to the corrupted data present in the system cache. In this case, you must clear the system cache using the recovery mode on your phone.
Switch OFF your smartphone.
Press and hold the “Power” and “Volume UP” buttons until you boot into recovery mode successfully.
Use the “volume” buttons to switch between different options and the “power” button to select the desired option in the recovery mode.
Select the “Wipe Cache Partition” option and continue by pressing the “Yes” to confirm.
Now, reboot your phone by selecting the “Reboot the System Now” option.
Unable to pull down the notification bar on your Samsung? This might be due to temporary software glitches on your phone. In some cases, this issue occurs due to wrong activity performed in the phone settings.
To resolve the temporary software glitches, Perform a soft reset on your phone.
Reset all your phone settings to default to eliminate the issues.
Perform a soft reset
Press and hold the “Power” and “Volume Down” buttons together until the “Power Off” options appear on the phone screen.
Select the “Power OFF” option and wait for your phone to completely turn OFF.
Wait for several minutes (2-3) and then press the Power button to turn ON your smartphone.
Reset all Settings
It will just restore your phone settings to default without deleting any of the data on your phone.
Open “Settings” on your phone.
Tap “General Management” and then “Reset”.
Tap “Reset all settings”
Finally, tap the “Reset settings” button.
Update the Phone Software
Updating your phone software is very crucial especially when you are facing any issues. There is a chance your phone might be affected by some bugs. The bugs can be fixed by updating the phone software.
Go to “Settings” on your phone.
Tap the “Software Update”.
Now, tap the ”Download and install” option.
If any recent version of the update is available, then download and install it on your phone.
Enable Touch Sensitivity
The screen protector applied to your phone might be too thick to affect the display touch sensitivity of your phone.
You can enhance the touch sensitivity of the screen with screen protectors by enabling the “touch sensitivity” option in the display settings.
Open “Settings” and then “Display” on your phone.
Scroll down a bit and enable the “Touch sensitivity” option.
Clear the Launcher Cache and Data
You can simply resolve this issue by clearing the cache and data of the launcher on your phone. Chances are that there might be some corrupted data present in the cache causing issues, so it can be removed.
Go to “Settings” on your phone.
Tap “Apps” and then “See all apps”.
Now, locate your launcher app in the list. If you are using the default system launcher “One UI Home”, then select the “One UI Home” app.
Select “Storage”.
Now, tap the “Clear cache” and “Clear data” options.
In case, you are using some third-party launcher apps on your phone, then follow the same steps above to reset your launcher by clearing the cache and data.
Reset System UI
You should also reset the system UI to default by clearing its cache and data. This will remove all the previous data stored in the system UI including the one that might be causing the issue.
Go to “Settings” on your phone.
Tap “Apps” and then “See all apps”.
Tap the “three-horizontal” lines and enable the “Show system apps” option.
Locate the “System UI” in the list and then select it.
Further, tap “Storage”.
Tap the “Clear cache” and “Clear data” options.
Now, restart your phone.
Enter Safe Mode
If the notification bar is working properly in the safe mode, then there might be some third-party apps present on your phone causing this issue. Try to remove all the recently installed third-party apps one by one and check if it resolves the issue.
Press and hold the “Power” and “Volume Down” buttons until the “Power Off” options appear on the phone screen.
Tap and hold the “Power Off” option until you see the “Safe mode” option appears.
Tap “Safe mode” and wait until the phone enters safe mode successfully. It should take several seconds.
Wipe Cache Partition
Sometimes, you may be required to perform a wipe cache partition to refresh system files on your phone. It can help resolve the software-related issues well. This can be done using the recovery mode of your phone.
Turn OFF your smartphone.
Press and hold the “Power” and “Volume UP” buttons until you boot into recovery mode successfully.
Use the “volume” buttons to switch between different options and the “power” button to select the desired option in the recovery mode.
Select the “Wipe Cache Partition” option and continue by pressing the “Yes” to confirm.
Finally, reboot your phone by selecting the “Reboot the System Now” option.
Perform Factory Data Reset
Restore all your phone settings to factory default by performing factory reset operation. It will delete all the data available on your phone and restore all the settings to factory default. It can deal with any kind of software-related issues.
If you are facing notification bar issues on your Oppo such that the notification bar is not coming down, then you need to address two things in the first place.
Eliminate the temporary software glitches.
Fix the Bugs in the phone software.
You should restart your phone, this can easily eliminate the temporary software glitches from your phone.
Update your phone software to eliminate the bugs. Go to “Settings->About Device->tap View updates”, further follow the on-screen instructions to download and install the updates on your phone.
Still unable to pull down the notification bar on your Oppo, here are some other proven fixes that can help you get rid of this issue.
Clean Up Storage
Insufficient storage space can prevent your phone from functioning properly. Check your phone storage, if there are junk files available on your phone, remove all the junk files to free up storage space.
Access the “Tools” folder on your phone home screen.
Tap “Phone Manager”.
Tap “Clean Up Storage” and then “Clean”.
Clear Cache of System UI
There might be some corrupted data involved in the cache causing the notification bar issues. Try to clear the System UI cache.
Open the “Settings” on your phone.
Tap “Apps” and then “App Management”.
Tap the “three-dots” menu icon and select “Show system”.
Locate the “System UI” in the list of apps and tap on it.
Tap “Storage usage” and then tap “Clear cache” and “Clear data”.
Enter Safe Mode
There might be some third-party apps hindering the certain functionality of your phone. If the notification bar is working properly in the safe mode, this shows your phone is harmed by some third-party apps.
Remove the recently installed third-party apps and then check if it resolves the issue.
Press and hold the “Power” button until the power menu appears on the screen.
Press and hold the “Power Off” option until another small menu pops up.
Now, select the “Safe Mode”
Reset all Settings
You might get stuck in several issues with the wrong activities being performed on your phone. This can be resolved by simply resetting your phone to default settings.
It will just restore your phone settings to default without deleting any of the data on your phone.
Open “Settings” on your phone.
Tap “System settings” or “Additional settings”.
Tap “Back up and reset”
Finally, tap “Reset all settings”.
Perform Wipe Cache Partition
Wipe cache partition can play a vital role in removing the system cache. So, if there is any corrupted data involved in the cache, it can be removed by performing a wipe cache partition using recovery mode.
Switch OFF your phone.
Press and hold the “Power” and “Volume down” together until the Oppo logo appears on the screen.
Now, select the “English” as a language.
Select “Wipe data and cache” and then confirm “Wipe cache”.
When the process finishes, select the “Reboot” option.