
After the latest Android 12 update, some users have reported stating that they are unable to move all items to the secure folder and wondering the way to get rid of this.
Quick Fix: Can’t Move Items to Secure Folder on Samsung
If you can’t move files or apps to Secure Folder on your Samsung phone, try these fixes:
- Restart your Samsung device
- Check Secure Folder permissions
- Update the Secure Folder app
- Ensure your file type is supported
- Clear Secure Folder cache
I experienced this issue on a Samsung Galaxy device after a system update. Updating the Secure Folder app from Galaxy Store resolved the problem.
Steps
- Launch the menu on your phone.
- Open “My Files”.
- Next, tap on “Internal Storage”.
- Now, tap on the “three dots” icon at the top right corner of the screen.
- Tap on “Create Folder” and name it as you wish.
- Now select all the items and move them to this newly created folder at once.
- After that, select all the items and move them to the secure folder.
Now, you will see all the items will be moved successfully without any issues.
Why All Items Are Not Moved Directly To The Secure Folder?
The items that are being downloaded on your phone from other sources such as Whatsapp or Facebook, Gmail, etc. It can’t be directly moved to a secure folder.
In that case, you will need to create another folder and move those items to that folder and then you can move them all at once to the secure folder.
How To Enable Secure Folder on Samsung Phones?
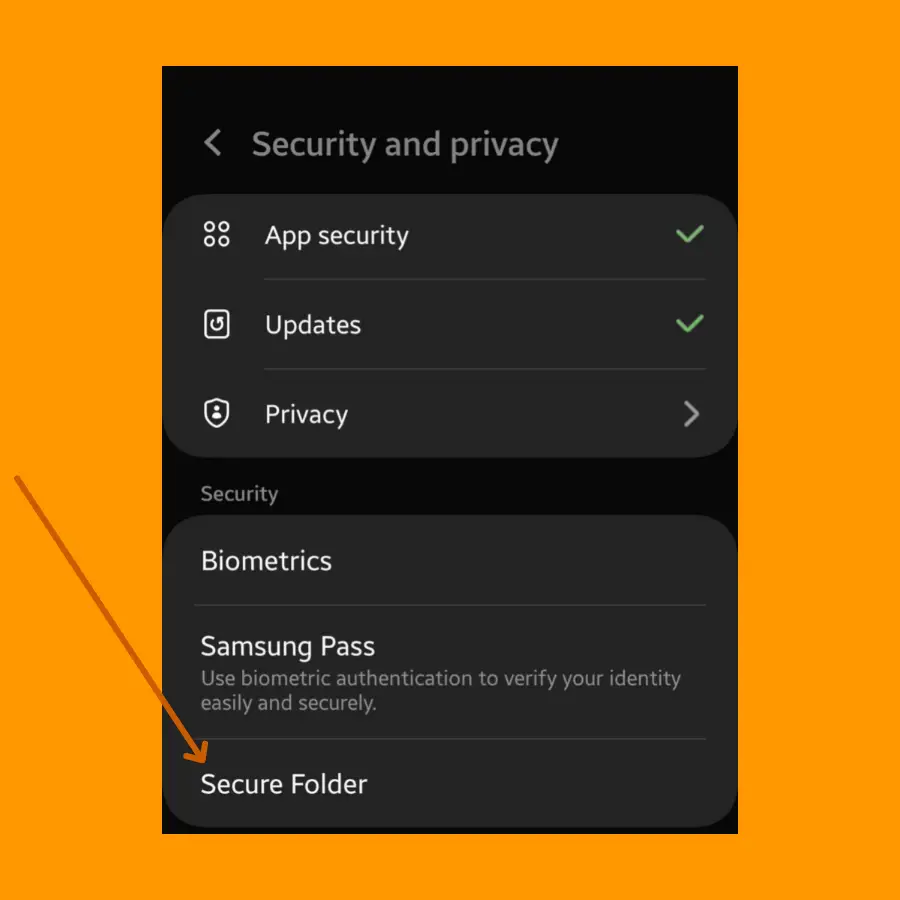
- Head over to “Settings” on your Samsung Phone.
- In settings, tap on “Biometric & Security”.
- Next, tap on the “Secure Folder” option.
- Now, It will start creating a secure folder, simply follow the on-screen instructions during the process.
- You will also be required to provide your Samsung account details and Google account along with setting up Protection such as Password/PIN or Fingerprint to access the secure folder.
- When the process completes, you will see a secure folder appear on your home screen or in the apps menu.
How To Access Secure Folder?
By default, the secure folder is hidden and can’t be accessed even after it has been created. To access the secure, you will need to enable it first. Here is how you can do that,
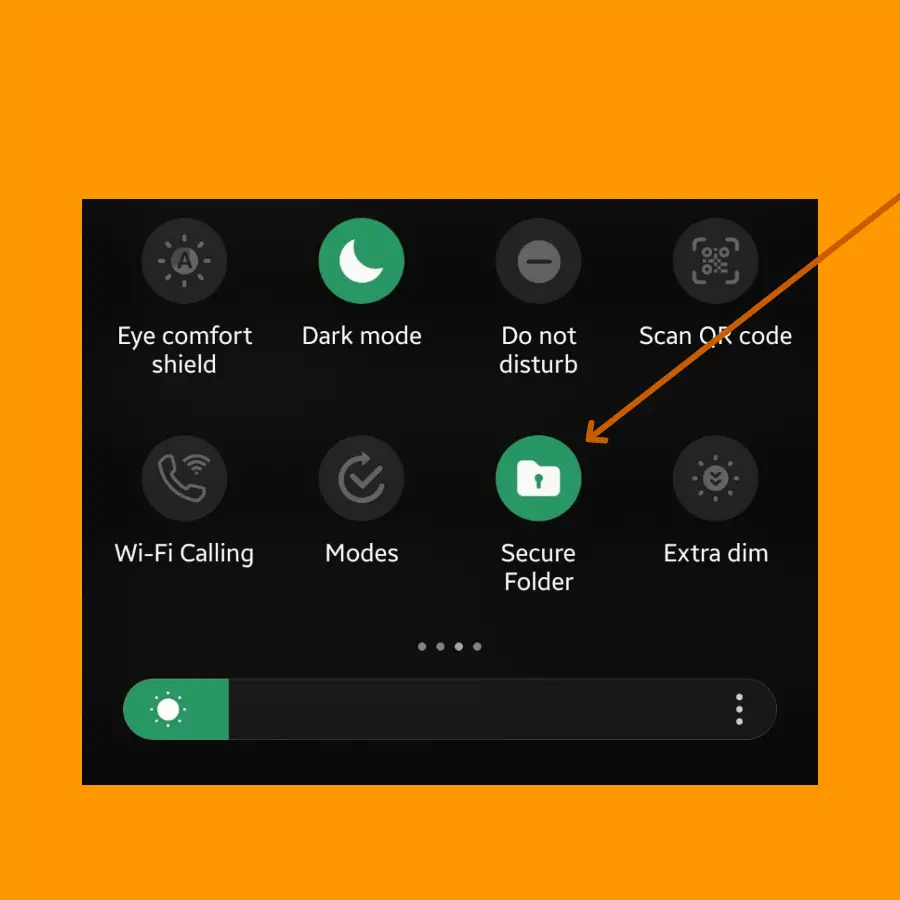
- Head over to the quick panel layout by swiping from the top edge to the bottom to completely expand the panel tray.
- Next, swipe the tray from left to right or right to left to locate the “Secure folder”.
- Once, you find the secure folder in the quick layout tray, just tap on it to enable or visible the secure folder on the home screen or apps menu.
OR
- Just head over to the “Settings->Biometric & Security->Secure Folder”.
- In secure Folder windows, tap on “Add Secure Folder to Apps screen” to turn the toggle ON.
How To Move Apps To Secure Folder?
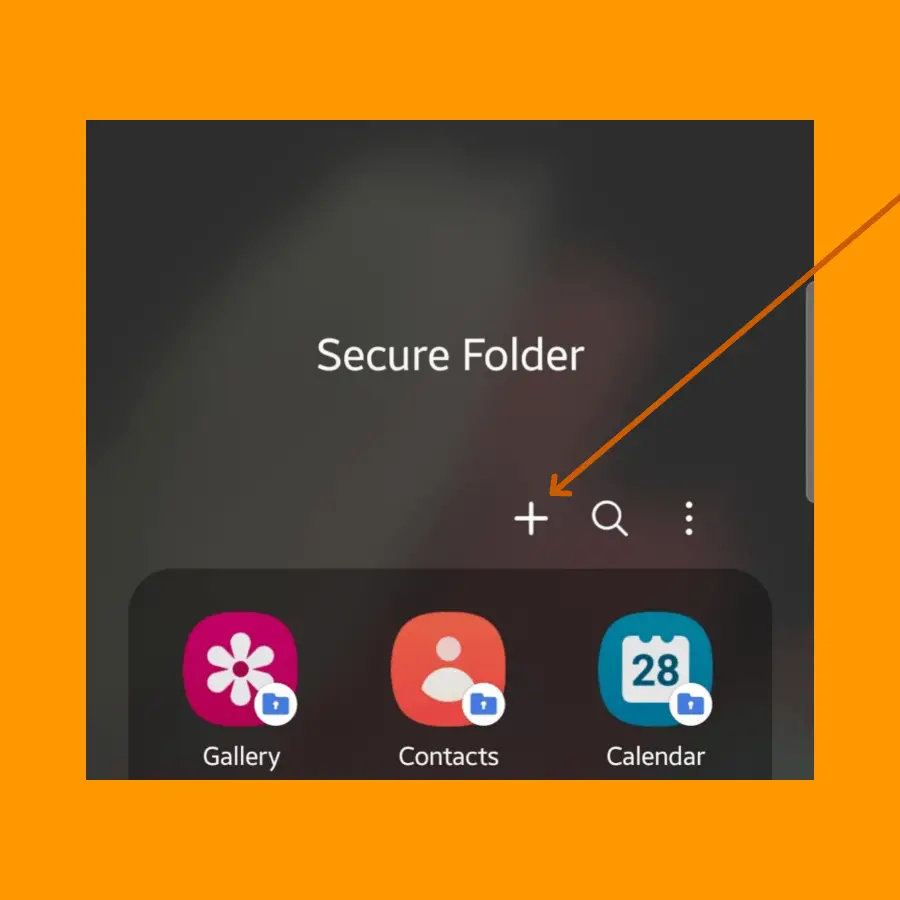
- Just launch the secure folder by providing the PIN/Password or Fingerprint for verification.
- Next, tap on the “+” icon at the top.
- Now, select apps that you want to move to the secure folder from all the apps available on your phone.
- Once, you select the desired apps, then tap on the “ADD” button to confirm.
- After that, the app will be successfully moved to the secure folder.
How To Move Files and Items To Secure Folder?
If you want to transfer the items such as files, photos, and videos, simply follow the below steps:
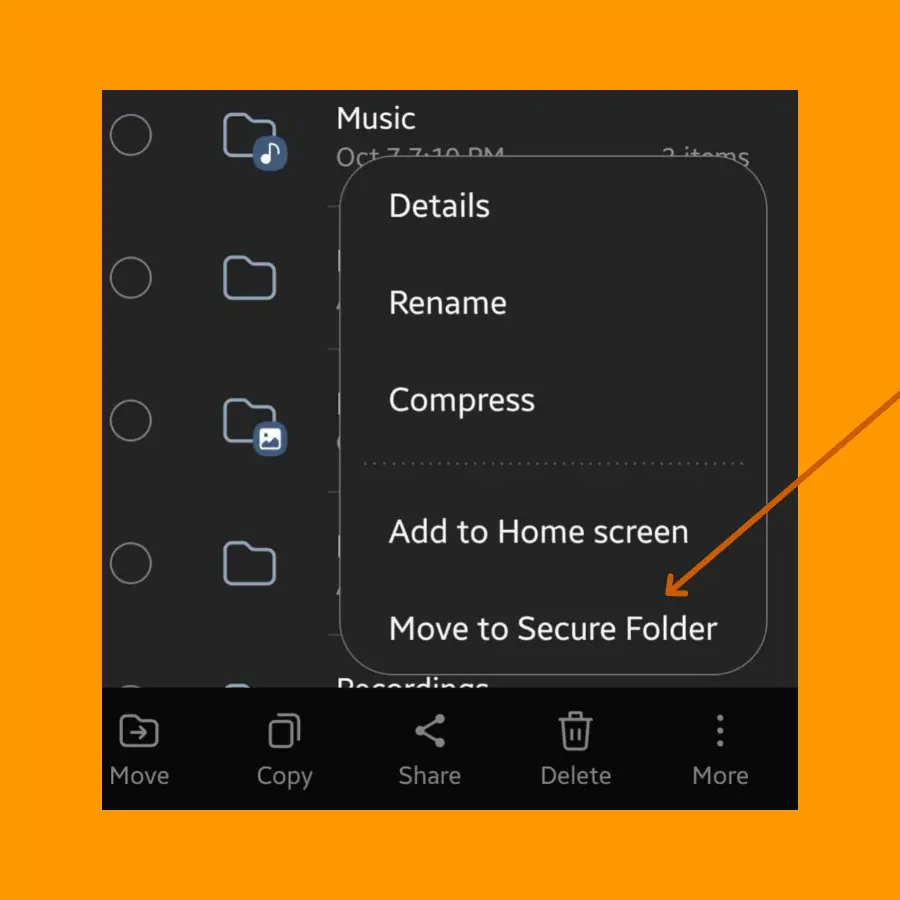
- Simply, just select the File by long pressing on it.
- Next, tap on the “three dots” icon referred to as More located below.
- Now, select the “Move to Secure Folder” option and you are good to go.
- That’s it, you have successfully moved the desired item to the secure folder.
How To Make Complete Back-up of Data on Secure Folder?
It is being noticed that Samsung has officially removed the backup option in the recent update of the secure folder.
There is no option to take a backup of data available on the secure folder other than moving all the data out of the secure folder first.
Once you are done with moving all the data from a secure folder, you can sync it with cloud storage or move it to a PC or laptop as a backup.
Bonus Tips – How To Customize Secure Folder?
You can also customize the secure folder. It also adapts vast customization by allowing you to change the name of the folder and the colors and select custom icons. Here’s how you can do that,
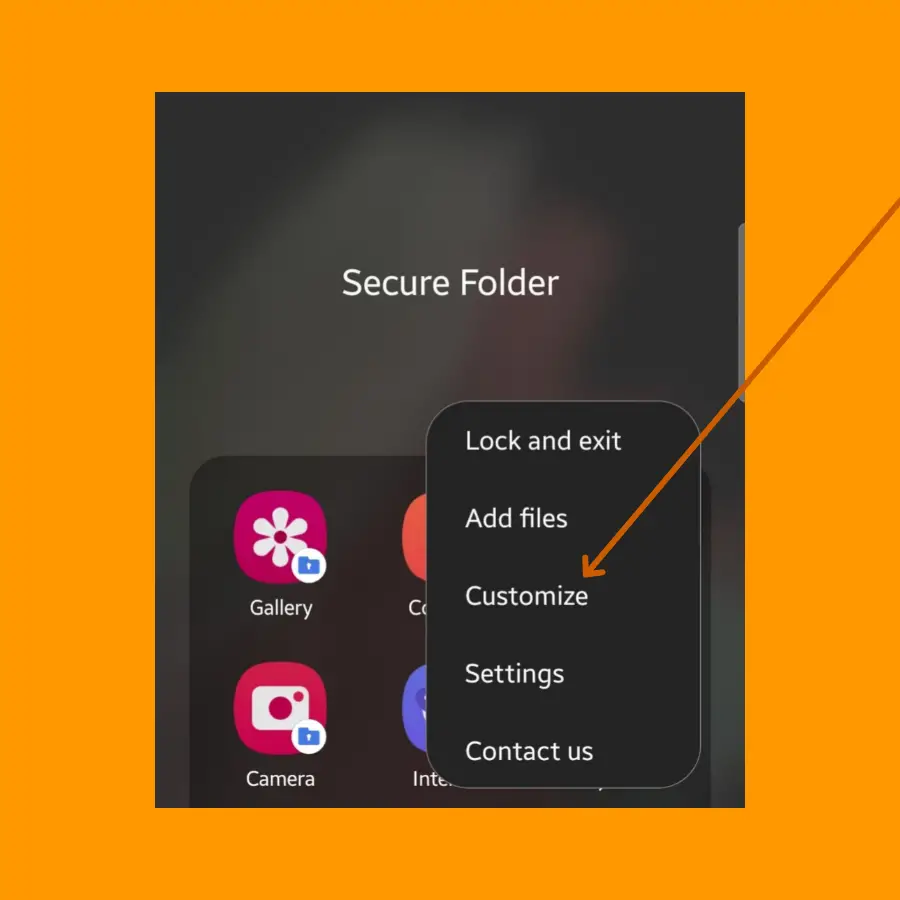
- Launch the “Secure Folder”.
- Tap on the “three dots” icon at the top right.
- Next, tap on “Customization”.
- Now, you can change the name of the secure folder by typing the custom name, selecting the color you want to apply to the folder icon, and also selecting the custom icon according to your will.
Frequently Asked Questions (FAQs)
This usually happens due to outdated Secure Folder apps, unsupported file types, or permission restrictions.
Open Gallery → select photos → tap three dots → choose Move to Secure Folder.
The option may not appear if Secure Folder is disabled or not updated.
Yes. Open Secure Folder → tap Add Apps → select the apps you want to secure.
Conclusion
The error “Couldn’t Move All Items To Secure Folder” occurs due to downloadable items such as files, photos, and videos. This is because the secure folder does not accept the downloadable items directly.
In that case, you will need to create a custom folder in the internal storage and then move all the items to that folder first.
Once all the items are moved to the custom folder, now you are all set to move all these items to the secure folder at once.