
You were going to make a purchase but suddenly came across a situation where you found the Google Pay app not working on your Samsung Galaxy S22 Ultra 5G. You might be wondering what to do to proceed with successful payment in that situation.
While making a payment using Gpay contactless payment, make sure you have enabled the NFC on your phone. Also, Gpay is selected as the default payment service in your NFC settings. Use the Fingerprint method to unlock your phone while using the NFC. It is highly recommended.
Many users are facing issues with their Samsung Galaxy S22 Ultra regarding Google Pay. When setting up Google Pay, it responds with “Your phone doesn’t meet the security requirements”.
Stay calm and don’t worry this is not the kind of situation to burden yourself with. All you need is just to take care of a few things here and you will be all set to get rid of that issue.
Update the Google Play Store
- Go to “Google Play Store”.
- Tap the “Profile icon” at the top right.
- Further, tap “Settings” and tap “About” to expand.
- Finally, press the “Update Play Store” under the Play Store version.
Update your Phone Software
- Head over to “Settings”.
- Tap “Software Update”.
- Further, tap “Download and install”.
If there is no official update available, then consider downgrading your phone to the previous version.
This issue has also been associated with the software update. Many users have solved the Google Pay not working issue by going back to the previous software version. You can revert your software to the previous version using Odin.
If you find it difficult to downgrade your phone software to the previous version, then follow other proven fixes that are discussed in detail ahead.
Google Pay Not Working on Samsung Galaxy S22 Ultra 5G
As Google Pay is an NFC app to provide a contactless payment service. Therefore if you get any error in NFC-supported apps, then the thing you should consider in the first place is to check the NFC configuration in your smartphone to confirm everything is set as per requirements.
- Make Google Pay as Default payment service
- Reboot your phone
- Update the Google Pay app
- Clear cache of Google Pay
- Verify Your Information on Google Pay App
- Uninstall and re-install Google Pay
- Perform Factory Reset

Choose Google Pay As Default Payment Service
If Google Pay is not selected as the default payment service while using NFC, then it might lead you to an unsuccessful transaction.
The reason is, that there could be many other NFC apps available on your Galaxy S22 Ultra 5G, and at the time of making a payment with Google Pay, It is also possible that some other NFC app is selected as your default payment service.
To eliminate this issue, you should select Google Pay as your default payment service while using NFC. Here’s how you can change the default payment service in NFC settings:
How To Change Default Payment Service in NFC Settings on Galaxy S22 Ultra 5G?
- Go to “Settings” on your phone.
- Next, locate and tap on “Connections”.
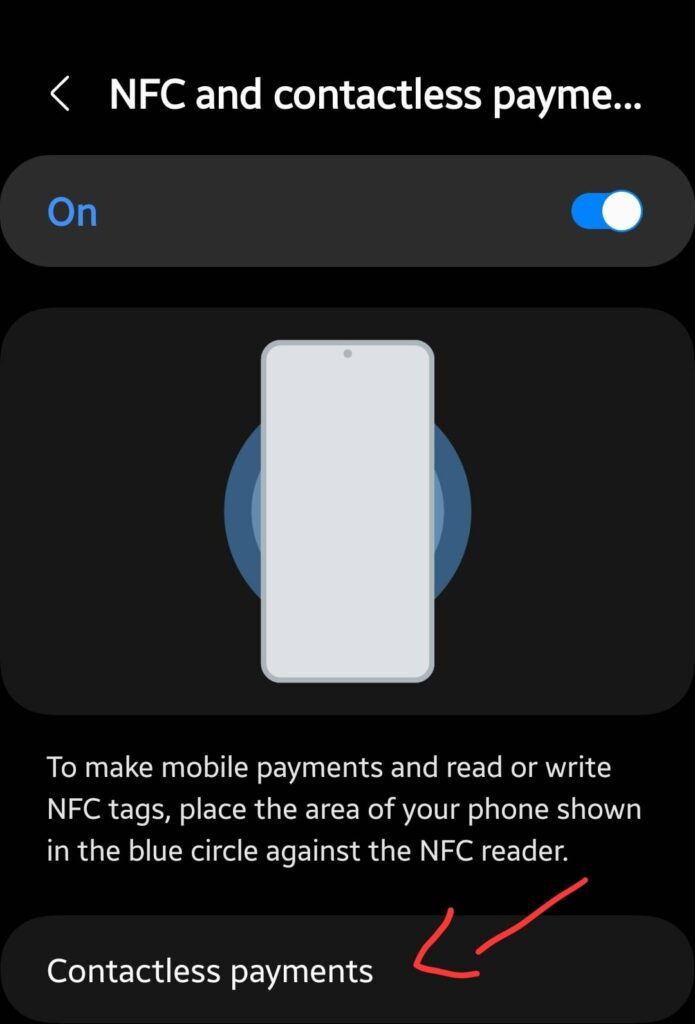
- Now, proceed with the “NFC and Contactless Payments” option
- After that, tap on the “Contactless payments” option.
- A list of all the available NFC apps on your phone will show up.
- Now, here you can select the Google Pay app as your default payment service.
- Once you select it, then follow the on-screen instructions to complete the process successfully.
Hopefully, by following the above-mentioned steps, Google Pay will start working without any issues. but in case you still face issues, then you should also consider clearing the cache and data of NFC services on your smartphone.
How To Clear Cache and Data of NFC Services on Galaxy S22 Ultra 5G?
- Head over to “Settings” on your phone.
- Next, tap on “Apps”.
- Now, a bit down you will see your app’s label with three lines on the right side of it. Just tap on the “three lines” and then enable the option “Show systems apps”.
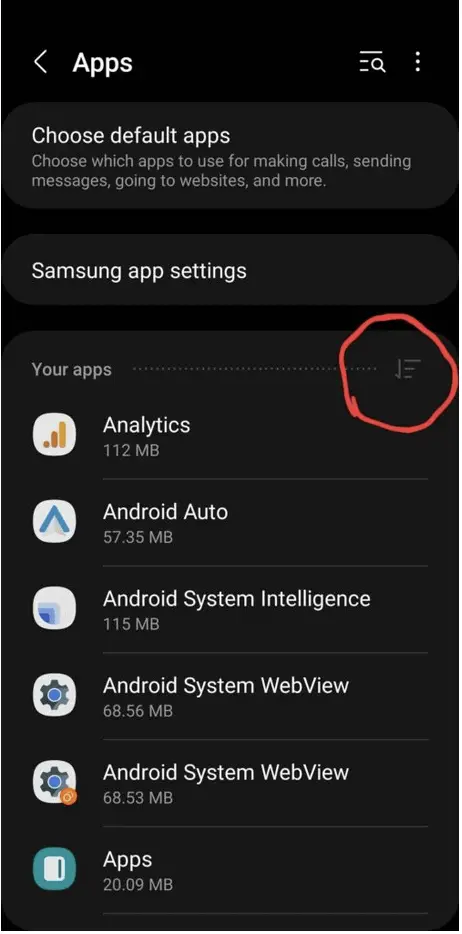
- Go back and search for the “NFC” option in your apps list now.
- Next, tap on “NFC->Storage”.
- Finally, tap on the option “Clear Cache” and “Clear Data” one by one.
- After that, reboot your phone to take a fresh start.
For more fixes, follow the complete troubleshooting process of NFC services on Galaxy S22 Ultra 5G.
if you are done with the NFC-related fixes and still find the google pay not working, then the issue might be with the Google Pay app. To fix the issue related to the app, head over to the below fixes.
Reboot your Phone
The rebooting process is very effective as it allows your phone to take a fresh start with all the available systems apps and third-party apps. Therefore, if some apps are stuck in an issue might get over it after rebooting your phone.
Here are the simple steps to soft reset your Galaxy S22 Ultra 5G.
- Press and Hold the Power and Volume Down buttons simultaneously.
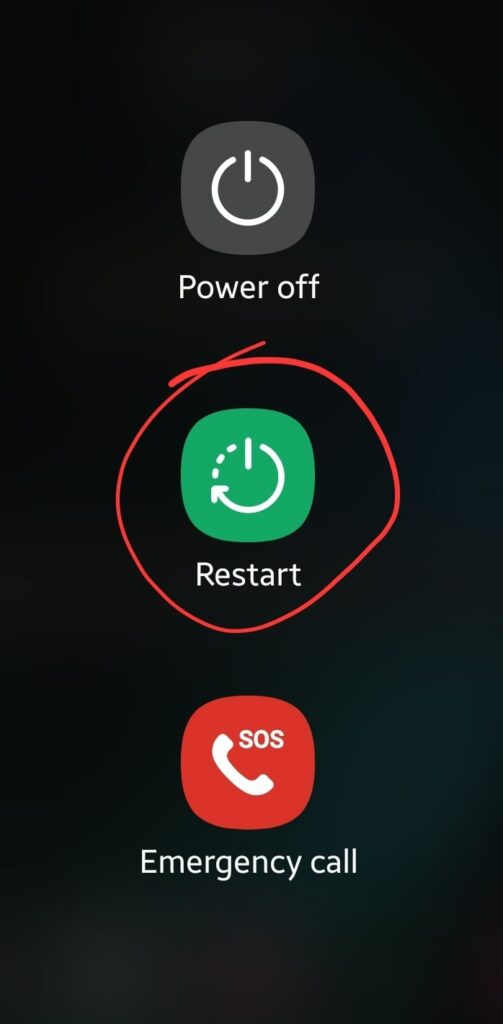
- Once, the power options appear on the screen, now release all the buttons.
- tap on the “Restart” option to reboot your phone.
Once, the phone boot up again, now check whether the Google Pay app is working properly or not.
Update Google Pay App

If you have paused the auto-update options for various apps including the Google Pay app, then it means you are using the outdated version of a particular app.
Such payment-related apps require the installation of updates to elevate the user experience to its best.
Therefore you should try to manually update the Google Pay app. Follow the steps below:
- Launch the “Play Store” on your phone.
- Type in “Google Pay”.
- If any update is available, then you will see the “Update” button.
- Simply, press the “Update” button to download and install the recent updates.
Clear Cache of Google Pay App
Most of the time, many issues occur due to the data available in the cache memory of the Google Pay app. It often stores unnecessary data in the cache memory which might result in not working properly.
To avoid this glitch, you should clear the cache of the Google Pay app on your Galaxy S22 Ultra 5G. here’s how you can do that,
- Go to “Settings” on your phone.
- Next, select “Apps”.
- Now, search for the “Google Pay” app and open it.
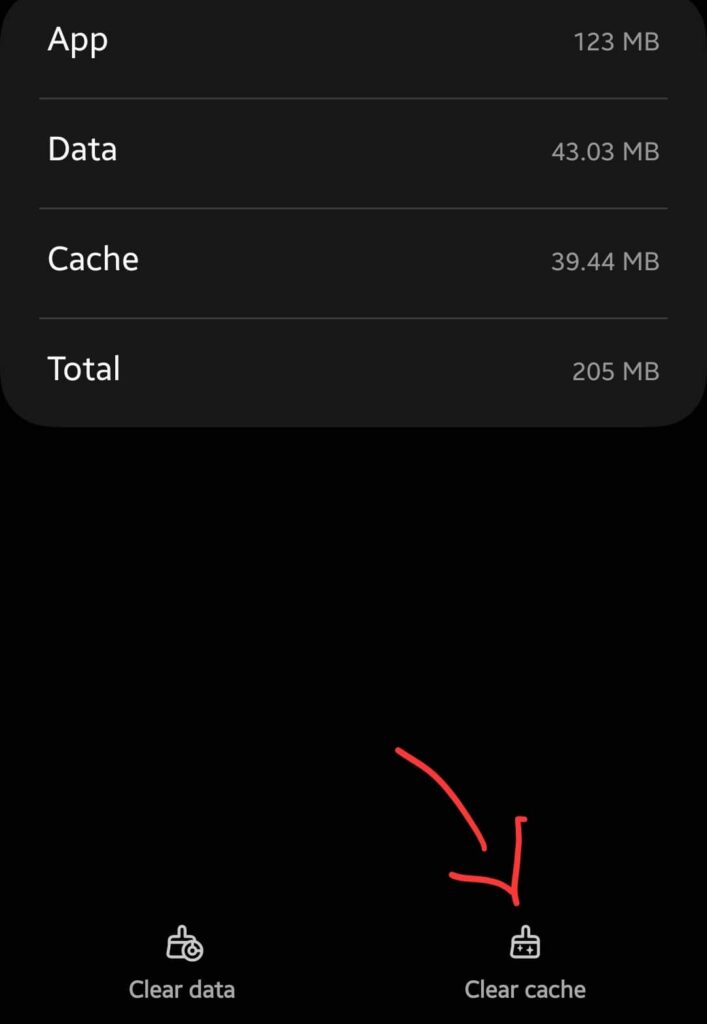
- After that, tap on the “Storage” option.
- Finally, tap the “Clear Cache” option at the bottom.
Once, you are done with it, now close the app if it running already, and then launch it again.
Verify Your Information on Google Pay App
There could also be a possibility that your information available on the Google Pay app might not be correct or that you forgot to confirm it while entering. You should review the information and if found any mistakes, then correct them.
Follow the steps below to verify your information on the Google Pay app:
- Launch the “Google Pay” app.
- Next, tap “Profile Photo” and then “Settings”.
- Now, tap on “Personel information”.
- Here, you will be able to see your all information. For example, if your phone number isn’t correct, then you can edit it and proceed with providing the correct phone number.
The same goes for the bank card information, you can also verify the card info whether it is correct or not. Simply follow the steps below:
- Once you have launched the Google Pay app, simply tap the Pay button at the top-center of the screen.
- Now, all the available cards that you have linked with Google Pay will be shown.
- Tap on the cards one by one to verify the information you have entered is correct or not.
OR
You can also remove the existing card and then simply tap on the “Add a payment method” option. Further, follow the instructions to set up your card by typing in the correct information.
Remove The App and Re-install It
If the app is surrounded by issues and you tried hard to fix it but still fails, then uninstalling might be the most suitable solution. Simply, go ahead and remove the app and then make a fresh install.
- Open the apps menu on your phone.
- Long press the Google Pay icon until the pop-up window appears.
- Now, press the “uninstall” option to remove the app.
- Once the app got uninstalled, then re-install it.
- After that, launch it and set it up accordingly from the beginning by providing the correct information.
I hope after the fresh install, Google Pay will start working and you will have no more issues ahead.
Perform Factory Data Reset

Factory data reset is the most effective method that can eliminate any kind of issue. This method wipes all the data and set all the settings to default on your smartphone.
So what you get after performing a factory data reset is the fresh beginning of your smartphone and feels like you have just unboxed it.
Things to consider before Performing a factory data reset:
- Charge your phone.
- Back up your important data.
How To Perform Factory Data Reset on Samsung Galaxy S22 Ultra 5G?
- Head over to “Settings” on your smartphone.
- Next, tap “General Management”.
- Scroll down to the bottom and you will see the “Reset” option. Just tap on it.
- Here, you will see various reset options.
- Tap on the one labeled “Factory Data Reset”.
- Now, it will provide you with a list of information stating that all the data will be erased from your phone.
- Simply scroll down to the bottom and tap on the “Reset” button.
Wait for the process to complete, once it finishes, the phone will boot up and will be directed to the Welcome screen. Now, set up your phone accordingly by following the on-screen instructions.
Conclusion
In this guide, we have summed up various techniques to fix the Google Pay issues on Samsung Galaxy S22 Ultra 5G. Following each one of the techniques mentioned above will lead you to eliminate all the issues that you encounter.
If you are stuck in the Google Pay app not working issue, then you should opt for the below fixes:
- Reboot your phone
- Check for the recent updates
- Clear the Cache
- Verify your information on Google Pay
- Remove the app and make a fresh install
That’s how you can cope with the issue on the Google Pay app. Hopefully, you find this guide helpful.
